PHP
PHP安装常见错误
编程 chris 发表了文章 0 个评论 1777 次浏览 2020-11-24 22:32

configure: error: Please reinstall the BZip2 distribution
解决: yum install bzip2-devel
configure: error: Please reinstall the libcurl distribution – easy.h should be in/include/curl/
解决: yum install curl-devel
configure: error: DBA: Could not find necessary header file(s).
解决: yum install db4-devel
configure: error: jpeglib.h not found.
解决: yum install libjpeg-devel
configure: error: png.h not found.
解决: yum install libpng-devel
configure: error: freetype.h not found.
解决: yum install -y freetype freetype-devel
configure: error: libXpm.(a|so) not found.
解决: yum install libXpm-devel
configure: error: Unable to locate gmp.h
解决: yum install gmp-devel
configure: error: utf8_mime2text() has new signature, but U8T_CANONICAL is missing. This should not happen. Check config.log for additional information.
解决: yum install libc-client-devel
configure: error: Cannot find ldap.h
解决: yum install openldap-devel
configure: error: ODBC header file ‘/usr/include/sqlext.h’ not found!
解决:yum install unixODBC-devel
configure: error: Cannot find libpq-fe.h. Please specify correct PostgreSQL installation path
解决: yum install postgresql-devel
configure: error: Please reinstall the sqlite3 distribution
解决: yum install sqlite-devel
configure: error: Cannot find pspell
解决: yum install aspell-devel
config.log for more information.
解决: yum install net-snmp-devel
configure: error: xslt-config not found. Please reinstall the libxslt >= 1.1.0 distribution
解决: yum install libxslt-devel
configure: error: xml2-config not found. Please check your libxml2 installation.
解决: yum install libxml2-devel
configure: error: Could not find pcre.h in /usr
解决: yum install pcre-devel
configure: error: Cannot find MySQL header files under yes. Note that the MySQL client library is not bundled anymore!
解决: yum install mysql-devel
configure: error: ODBC header file ‘/usr/include/sqlext.h’ not found!
解决: yum install unixODBC-devel
configure: error: Cannot find libpq-fe.h. Please specify correct PostgreSQL installation path
解决:yum install postgresql-devel
configure: error: Cannot find pspell
解决: yum install pspell-devel
configure: error: Could not find net-snmp-config binary. Please check your net-snmp installation.
解决: yum install net-snmp-devel
configure: error: xslt-config not found. Please reinstall the libxslt >= 1.1.0 distribution
解决: yum install libxslt-devel
configure: error: mcrypt.h not found. Please reinstall libmcrypt.
解决: yum install -y libmcrypt-devel
一些常见错误技术问题汇总
运维 Geek小A 发表了文章 0 个评论 2496 次浏览 2020-07-05 01:48
Q: 启动apache报错 [warn] module php5_module is already loaded, skipping
一般出现这种问题有两种情况:
1.在apache安装目录conf下httpd.conf里可能重复了一行LoadModule php5_module modules/libphp5.so,删除重复的行就行。
2.或者在其他的conf文件中加载load了,如下yum安装的httpd,conf.d/php.conf里
LoadModule php5_module modules/libphp5.so
Q: centos 6.2 更新报错解决 yum you could try using skip broken to work around the problem
# yum update上述更新错误,解决方法如下:
Loaded plugins: aliases, changelog, downloadonly, kabi, presto, refresh-
: packagekit, security, tmprepo, verify, versionlock
Loading support for Red Hat kernel ABI
adobe-linux-x86_64 | 951 B 00:00
google-chrome | 951 B 00:00 ...
sl | 3.2 kB 00:00
sl-security | 1.9 kB 00:00
Setting up Update Process
Resolving Dependencies
--> Running transaction check
---> Package python-qpid.noarch 0:0.12-1.el6 will be updated
---> Package python-qpid.noarch 0:0.14-11.el6_3 will be an update
---> Package python-qpid-qmf.x86_64 0:0.12-6.el6 will be updated
---> Package python-qpid-qmf.x86_64 0:0.14-14.el6_3 will be an update
---> Package qpid-cpp-client.x86_64 0:0.12-6.el6 will be updated
--> Processing Dependency: libqpidclient.so.5()(64bit) for package: matahari-agent-lib-0.4.4-11.el6.x86_64
--> Processing Dependency: libqpidclient.so.5()(64bit) for package: matahari-network-0.4.4-11.el6.x86_64
--> Processing Dependency: libqpidclient.so.5()(64bit) for package: matahari-sysconfig-0.4.4-11.el6.x86_64
--> Processing Dependency: libqpidclient.so.5()(64bit) for package: matahari-service-0.4.4-11.el6.x86_64
--> Processing Dependency: libqpidclient.so.5()(64bit) for package: matahari-host-0.4.4-11.el6.x86_64
--> Processing Dependency: libqpidcommon.so.5()(64bit) for package: matahari-network-0.4.4-11.el6.x86_64
--> Processing Dependency: libqpidcommon.so.5()(64bit) for package: matahari-host-0.4.4-11.el6.x86_64
--> Processing Dependency: libqpidcommon.so.5()(64bit) for package: matahari-sysconfig-0.4.4-11.el6.x86_64
--> Processing Dependency: libqpidcommon.so.5()(64bit) for package: libvirt-qmf-0.3.0-4.el6.x86_64
--> Processing Dependency: libqpidcommon.so.5()(64bit) for package: matahari-agent-lib-0.4.4-11.el6.x86_64
--> Processing Dependency: libqpidcommon.so.5()(64bit) for package: matahari-service-0.4.4-11.el6.x86_64
---> Package qpid-cpp-client.x86_64 0:0.14-22.el6_3 will be an update
---> Package qpid-cpp-client-ssl.x86_64 0:0.12-6.el6 will be updated
---> Package qpid-cpp-client-ssl.x86_64 0:0.14-22.el6_3 will be an update
---> Package qpid-cpp-server.x86_64 0:0.12-6.el6 will be updated
---> Package qpid-cpp-server.x86_64 0:0.14-22.el6_3 will be an update
---> Package qpid-cpp-server-ssl.x86_64 0:0.12-6.el6 will be updated
---> Package qpid-cpp-server-ssl.x86_64 0:0.14-22.el6_3 will be an update
---> Package qpid-qmf.x86_64 0:0.12-6.el6 will be updated
---> Package qpid-qmf.x86_64 0:0.14-14.el6_3 will be an update
---> Package qpid-tools.noarch 0:0.12-2.el6 will be updated
---> Package qpid-tools.noarch 0:0.14-6.el6_3 will be an update
---> Package ruby-qpid-qmf.x86_64 0:0.12-6.el6 will be updated
---> Package ruby-qpid-qmf.x86_64 0:0.14-14.el6_3 will be an update
--> Finished Dependency Resolution
Error: Package: matahari-host-0.4.4-11.el6.x86_64 (@anaconda-ScientificLinux-201202061444.x86_64)
Requires: libqpidclient.so.5()(64bit)
Removing: qpid-cpp-client-0.12-6.el6.x86_64 (@anaconda-ScientificLinux-201202061444.x86_64)
libqpidclient.so.5()(64bit)
Updated By: qpid-cpp-client-0.14-22.el6_3.x86_64 (sl-security)
Not found
Error: Package: matahari-sysconfig-0.4.4-11.el6.x86_64 (@anaconda-ScientificLinux-201202061444.x86_64)
Requires: libqpidclient.so.5()(64bit)
Removing: qpid-cpp-client-0.12-6.el6.x86_64 (@anaconda-ScientificLinux-201202061444.x86_64)
libqpidclient.so.5()(64bit)
Updated By: qpid-cpp-client-0.14-22.el6_3.x86_64 (sl-security)
Not found
Error: Package: matahari-service-0.4.4-11.el6.x86_64 (@anaconda-ScientificLinux-201202061444.x86_64)
Requires: libqpidcommon.so.5()(64bit)
Removing: qpid-cpp-client-0.12-6.el6.x86_64 (@anaconda-ScientificLinux-201202061444.x86_64)
libqpidcommon.so.5()(64bit)
Updated By: qpid-cpp-client-0.14-22.el6_3.x86_64 (sl-security)
Not found
Error: Package: matahari-network-0.4.4-11.el6.x86_64 (@anaconda-ScientificLinux-201202061444.x86_64)
Requires: libqpidclient.so.5()(64bit)
Removing: qpid-cpp-client-0.12-6.el6.x86_64 (@anaconda-ScientificLinux-201202061444.x86_64)
libqpidclient.so.5()(64bit)
Updated By: qpid-cpp-client-0.14-22.el6_3.x86_64 (sl-security)
Not found
Error: Package: matahari-sysconfig-0.4.4-11.el6.x86_64 (@anaconda-ScientificLinux-201202061444.x86_64)
Requires: libqpidcommon.so.5()(64bit)
Removing: qpid-cpp-client-0.12-6.el6.x86_64 (@anaconda-ScientificLinux-201202061444.x86_64)
libqpidcommon.so.5()(64bit)
Updated By: qpid-cpp-client-0.14-22.el6_3.x86_64 (sl-security)
Not found
Error: Package: matahari-host-0.4.4-11.el6.x86_64 (@anaconda-ScientificLinux-201202061444.x86_64)
Requires: libqpidcommon.so.5()(64bit)
Removing: qpid-cpp-client-0.12-6.el6.x86_64 (@anaconda-ScientificLinux-201202061444.x86_64)
libqpidcommon.so.5()(64bit)
Updated By: qpid-cpp-client-0.14-22.el6_3.x86_64 (sl-security)
Not found
Error: Package: libvirt-qmf-0.3.0-4.el6.x86_64 (@anaconda-ScientificLinux-201202061444.x86_64)
Requires: libqpidcommon.so.5()(64bit)
Removing: qpid-cpp-client-0.12-6.el6.x86_64 (@anaconda-ScientificLinux-201202061444.x86_64)
libqpidcommon.so.5()(64bit)
Updated By: qpid-cpp-client-0.14-22.el6_3.x86_64 (sl-security)
Not found
Error: Package: matahari-agent-lib-0.4.4-11.el6.x86_64 (@anaconda-ScientificLinux-201202061444.x86_64)
Requires: libqpidcommon.so.5()(64bit)
Removing: qpid-cpp-client-0.12-6.el6.x86_64 (@anaconda-ScientificLinux-201202061444.x86_64)
libqpidcommon.so.5()(64bit)
Updated By: qpid-cpp-client-0.14-22.el6_3.x86_64 (sl-security)
Not found
Error: Package: matahari-network-0.4.4-11.el6.x86_64 (@anaconda-ScientificLinux-201202061444.x86_64)
Requires: libqpidcommon.so.5()(64bit)
Removing: qpid-cpp-client-0.12-6.el6.x86_64 (@anaconda-ScientificLinux-201202061444.x86_64)
libqpidcommon.so.5()(64bit)
Updated By: qpid-cpp-client-0.14-22.el6_3.x86_64 (sl-security)
Not found
Error: Package: matahari-agent-lib-0.4.4-11.el6.x86_64 (@anaconda-ScientificLinux-201202061444.x86_64)
Requires: libqpidclient.so.5()(64bit)
Removing: qpid-cpp-client-0.12-6.el6.x86_64 (@anaconda-ScientificLinux-201202061444.x86_64)
libqpidclient.so.5()(64bit)
Updated By: qpid-cpp-client-0.14-22.el6_3.x86_64 (sl-security)
Not found
Error: Package: matahari-service-0.4.4-11.el6.x86_64 (@anaconda-ScientificLinux-201202061444.x86_64)
Requires: libqpidclient.so.5()(64bit)
Removing: qpid-cpp-client-0.12-6.el6.x86_64 (@anaconda-ScientificLinux-201202061444.x86_64)
libqpidclient.so.5()(64bit)
Updated By: qpid-cpp-client-0.14-22.el6_3.x86_64 (sl-security)
Not found
You could try using --skip-broken to work around the problem
** Found 1 pre-existing rpmdb problem(s), 'yum check' output follows:
libvpx-1.0.0-1.el6.x86_64 is a duplicate with libvpx-0.9.0-8.el6_0.x86_64
yum remove matahari*执行完后,然后执行yun update 更新,这样应该就可以了。
Q: Cannot load /…/libphp5.so into server: /…/libphp5.so: undefined symbol: _efree
此错误是由于重装php时,没有关闭apache。解决方法:调转到php安装目录,执行“make clean”,然后从新安装php,记得安装之前关闭apache。
Q: apache启动报错(98)Address already in use: make_sock: could not bind to address :80
端口占用情况:

#netstat -lnp|grep 80

#ps 端口号为80的进程

#kill -9 端口号为80的进程(可能进程不止一个)
Q: 从源码安装apache2,遇到错误:cannot install `libaprutil-1.la'
这是由于configure过一次,没有清理干净,需要清理。可以删除掉源码目录,重新解压源码,重新安装,或者make clean.
PHP安装常见错误
编程 chris 发表了文章 0 个评论 1777 次浏览 2020-11-24 22:32

configure: error: Please reinstall the BZip2 distribution
解决: yum install bzip2-devel
configure: error: Please reinstall the libcurl distribution – easy.h should be in/include/curl/
解决: yum install curl-devel
configure: error: DBA: Could not find necessary header file(s).
解决: yum install db4-devel
configure: error: jpeglib.h not found.
解决: yum install libjpeg-devel
configure: error: png.h not found.
解决: yum install libpng-devel
configure: error: freetype.h not found.
解决: yum install -y freetype freetype-devel
configure: error: libXpm.(a|so) not found.
解决: yum install libXpm-devel
configure: error: Unable to locate gmp.h
解决: yum install gmp-devel
configure: error: utf8_mime2text() has new signature, but U8T_CANONICAL is missing. This should not happen. Check config.log for additional information.
解决: yum install libc-client-devel
configure: error: Cannot find ldap.h
解决: yum install openldap-devel
configure: error: ODBC header file ‘/usr/include/sqlext.h’ not found!
解决:yum install unixODBC-devel
configure: error: Cannot find libpq-fe.h. Please specify correct PostgreSQL installation path
解决: yum install postgresql-devel
configure: error: Please reinstall the sqlite3 distribution
解决: yum install sqlite-devel
configure: error: Cannot find pspell
解决: yum install aspell-devel
config.log for more information.
解决: yum install net-snmp-devel
configure: error: xslt-config not found. Please reinstall the libxslt >= 1.1.0 distribution
解决: yum install libxslt-devel
configure: error: xml2-config not found. Please check your libxml2 installation.
解决: yum install libxml2-devel
configure: error: Could not find pcre.h in /usr
解决: yum install pcre-devel
configure: error: Cannot find MySQL header files under yes. Note that the MySQL client library is not bundled anymore!
解决: yum install mysql-devel
configure: error: ODBC header file ‘/usr/include/sqlext.h’ not found!
解决: yum install unixODBC-devel
configure: error: Cannot find libpq-fe.h. Please specify correct PostgreSQL installation path
解决:yum install postgresql-devel
configure: error: Cannot find pspell
解决: yum install pspell-devel
configure: error: Could not find net-snmp-config binary. Please check your net-snmp installation.
解决: yum install net-snmp-devel
configure: error: xslt-config not found. Please reinstall the libxslt >= 1.1.0 distribution
解决: yum install libxslt-devel
configure: error: mcrypt.h not found. Please reinstall libmcrypt.
解决: yum install -y libmcrypt-devel
一些常见错误技术问题汇总
运维 Geek小A 发表了文章 0 个评论 2496 次浏览 2020-07-05 01:48
Q: 启动apache报错 [warn] module php5_module is already loaded, skipping
一般出现这种问题有两种情况:
1.在apache安装目录conf下httpd.conf里可能重复了一行LoadModule php5_module modules/libphp5.so,删除重复的行就行。
2.或者在其他的conf文件中加载load了,如下yum安装的httpd,conf.d/php.conf里
LoadModule php5_module modules/libphp5.so
Q: centos 6.2 更新报错解决 yum you could try using skip broken to work around the problem
# yum update上述更新错误,解决方法如下:
Loaded plugins: aliases, changelog, downloadonly, kabi, presto, refresh-
: packagekit, security, tmprepo, verify, versionlock
Loading support for Red Hat kernel ABI
adobe-linux-x86_64 | 951 B 00:00
google-chrome | 951 B 00:00 ...
sl | 3.2 kB 00:00
sl-security | 1.9 kB 00:00
Setting up Update Process
Resolving Dependencies
--> Running transaction check
---> Package python-qpid.noarch 0:0.12-1.el6 will be updated
---> Package python-qpid.noarch 0:0.14-11.el6_3 will be an update
---> Package python-qpid-qmf.x86_64 0:0.12-6.el6 will be updated
---> Package python-qpid-qmf.x86_64 0:0.14-14.el6_3 will be an update
---> Package qpid-cpp-client.x86_64 0:0.12-6.el6 will be updated
--> Processing Dependency: libqpidclient.so.5()(64bit) for package: matahari-agent-lib-0.4.4-11.el6.x86_64
--> Processing Dependency: libqpidclient.so.5()(64bit) for package: matahari-network-0.4.4-11.el6.x86_64
--> Processing Dependency: libqpidclient.so.5()(64bit) for package: matahari-sysconfig-0.4.4-11.el6.x86_64
--> Processing Dependency: libqpidclient.so.5()(64bit) for package: matahari-service-0.4.4-11.el6.x86_64
--> Processing Dependency: libqpidclient.so.5()(64bit) for package: matahari-host-0.4.4-11.el6.x86_64
--> Processing Dependency: libqpidcommon.so.5()(64bit) for package: matahari-network-0.4.4-11.el6.x86_64
--> Processing Dependency: libqpidcommon.so.5()(64bit) for package: matahari-host-0.4.4-11.el6.x86_64
--> Processing Dependency: libqpidcommon.so.5()(64bit) for package: matahari-sysconfig-0.4.4-11.el6.x86_64
--> Processing Dependency: libqpidcommon.so.5()(64bit) for package: libvirt-qmf-0.3.0-4.el6.x86_64
--> Processing Dependency: libqpidcommon.so.5()(64bit) for package: matahari-agent-lib-0.4.4-11.el6.x86_64
--> Processing Dependency: libqpidcommon.so.5()(64bit) for package: matahari-service-0.4.4-11.el6.x86_64
---> Package qpid-cpp-client.x86_64 0:0.14-22.el6_3 will be an update
---> Package qpid-cpp-client-ssl.x86_64 0:0.12-6.el6 will be updated
---> Package qpid-cpp-client-ssl.x86_64 0:0.14-22.el6_3 will be an update
---> Package qpid-cpp-server.x86_64 0:0.12-6.el6 will be updated
---> Package qpid-cpp-server.x86_64 0:0.14-22.el6_3 will be an update
---> Package qpid-cpp-server-ssl.x86_64 0:0.12-6.el6 will be updated
---> Package qpid-cpp-server-ssl.x86_64 0:0.14-22.el6_3 will be an update
---> Package qpid-qmf.x86_64 0:0.12-6.el6 will be updated
---> Package qpid-qmf.x86_64 0:0.14-14.el6_3 will be an update
---> Package qpid-tools.noarch 0:0.12-2.el6 will be updated
---> Package qpid-tools.noarch 0:0.14-6.el6_3 will be an update
---> Package ruby-qpid-qmf.x86_64 0:0.12-6.el6 will be updated
---> Package ruby-qpid-qmf.x86_64 0:0.14-14.el6_3 will be an update
--> Finished Dependency Resolution
Error: Package: matahari-host-0.4.4-11.el6.x86_64 (@anaconda-ScientificLinux-201202061444.x86_64)
Requires: libqpidclient.so.5()(64bit)
Removing: qpid-cpp-client-0.12-6.el6.x86_64 (@anaconda-ScientificLinux-201202061444.x86_64)
libqpidclient.so.5()(64bit)
Updated By: qpid-cpp-client-0.14-22.el6_3.x86_64 (sl-security)
Not found
Error: Package: matahari-sysconfig-0.4.4-11.el6.x86_64 (@anaconda-ScientificLinux-201202061444.x86_64)
Requires: libqpidclient.so.5()(64bit)
Removing: qpid-cpp-client-0.12-6.el6.x86_64 (@anaconda-ScientificLinux-201202061444.x86_64)
libqpidclient.so.5()(64bit)
Updated By: qpid-cpp-client-0.14-22.el6_3.x86_64 (sl-security)
Not found
Error: Package: matahari-service-0.4.4-11.el6.x86_64 (@anaconda-ScientificLinux-201202061444.x86_64)
Requires: libqpidcommon.so.5()(64bit)
Removing: qpid-cpp-client-0.12-6.el6.x86_64 (@anaconda-ScientificLinux-201202061444.x86_64)
libqpidcommon.so.5()(64bit)
Updated By: qpid-cpp-client-0.14-22.el6_3.x86_64 (sl-security)
Not found
Error: Package: matahari-network-0.4.4-11.el6.x86_64 (@anaconda-ScientificLinux-201202061444.x86_64)
Requires: libqpidclient.so.5()(64bit)
Removing: qpid-cpp-client-0.12-6.el6.x86_64 (@anaconda-ScientificLinux-201202061444.x86_64)
libqpidclient.so.5()(64bit)
Updated By: qpid-cpp-client-0.14-22.el6_3.x86_64 (sl-security)
Not found
Error: Package: matahari-sysconfig-0.4.4-11.el6.x86_64 (@anaconda-ScientificLinux-201202061444.x86_64)
Requires: libqpidcommon.so.5()(64bit)
Removing: qpid-cpp-client-0.12-6.el6.x86_64 (@anaconda-ScientificLinux-201202061444.x86_64)
libqpidcommon.so.5()(64bit)
Updated By: qpid-cpp-client-0.14-22.el6_3.x86_64 (sl-security)
Not found
Error: Package: matahari-host-0.4.4-11.el6.x86_64 (@anaconda-ScientificLinux-201202061444.x86_64)
Requires: libqpidcommon.so.5()(64bit)
Removing: qpid-cpp-client-0.12-6.el6.x86_64 (@anaconda-ScientificLinux-201202061444.x86_64)
libqpidcommon.so.5()(64bit)
Updated By: qpid-cpp-client-0.14-22.el6_3.x86_64 (sl-security)
Not found
Error: Package: libvirt-qmf-0.3.0-4.el6.x86_64 (@anaconda-ScientificLinux-201202061444.x86_64)
Requires: libqpidcommon.so.5()(64bit)
Removing: qpid-cpp-client-0.12-6.el6.x86_64 (@anaconda-ScientificLinux-201202061444.x86_64)
libqpidcommon.so.5()(64bit)
Updated By: qpid-cpp-client-0.14-22.el6_3.x86_64 (sl-security)
Not found
Error: Package: matahari-agent-lib-0.4.4-11.el6.x86_64 (@anaconda-ScientificLinux-201202061444.x86_64)
Requires: libqpidcommon.so.5()(64bit)
Removing: qpid-cpp-client-0.12-6.el6.x86_64 (@anaconda-ScientificLinux-201202061444.x86_64)
libqpidcommon.so.5()(64bit)
Updated By: qpid-cpp-client-0.14-22.el6_3.x86_64 (sl-security)
Not found
Error: Package: matahari-network-0.4.4-11.el6.x86_64 (@anaconda-ScientificLinux-201202061444.x86_64)
Requires: libqpidcommon.so.5()(64bit)
Removing: qpid-cpp-client-0.12-6.el6.x86_64 (@anaconda-ScientificLinux-201202061444.x86_64)
libqpidcommon.so.5()(64bit)
Updated By: qpid-cpp-client-0.14-22.el6_3.x86_64 (sl-security)
Not found
Error: Package: matahari-agent-lib-0.4.4-11.el6.x86_64 (@anaconda-ScientificLinux-201202061444.x86_64)
Requires: libqpidclient.so.5()(64bit)
Removing: qpid-cpp-client-0.12-6.el6.x86_64 (@anaconda-ScientificLinux-201202061444.x86_64)
libqpidclient.so.5()(64bit)
Updated By: qpid-cpp-client-0.14-22.el6_3.x86_64 (sl-security)
Not found
Error: Package: matahari-service-0.4.4-11.el6.x86_64 (@anaconda-ScientificLinux-201202061444.x86_64)
Requires: libqpidclient.so.5()(64bit)
Removing: qpid-cpp-client-0.12-6.el6.x86_64 (@anaconda-ScientificLinux-201202061444.x86_64)
libqpidclient.so.5()(64bit)
Updated By: qpid-cpp-client-0.14-22.el6_3.x86_64 (sl-security)
Not found
You could try using --skip-broken to work around the problem
** Found 1 pre-existing rpmdb problem(s), 'yum check' output follows:
libvpx-1.0.0-1.el6.x86_64 is a duplicate with libvpx-0.9.0-8.el6_0.x86_64
yum remove matahari*执行完后,然后执行yun update 更新,这样应该就可以了。
Q: Cannot load /…/libphp5.so into server: /…/libphp5.so: undefined symbol: _efree
此错误是由于重装php时,没有关闭apache。解决方法:调转到php安装目录,执行“make clean”,然后从新安装php,记得安装之前关闭apache。
Q: apache启动报错(98)Address already in use: make_sock: could not bind to address :80
端口占用情况:

#netstat -lnp|grep 80

#ps 端口号为80的进程

#kill -9 端口号为80的进程(可能进程不止一个)
Q: 从源码安装apache2,遇到错误:cannot install `libaprutil-1.la'
这是由于configure过一次,没有清理干净,需要清理。可以删除掉源码目录,重新解压源码,重新安装,或者make clean.
Centos7下使用Yum安装Zabbix2.4
运维 Geek小A 发表了文章 0 个评论 2898 次浏览 2017-06-17 18:09
一、Zabbix简介
zabbix是一个基于WEB界面的提供分布式系统监视以及网络监视功能的企业级的开源解决方案。zabbix能监视各种网络参数,保证服务器系统的安全运营;并提供灵活的通知机制以让系统管理员快速定位/解决存在的各种问题。
二、Zabbix安装
本文档在同一台机器上安装了zabbix-server 和zabbix-agent 自己监控自己。
1、配置LAMP
这个可以参考之前的文章:http://openskill.cn/article/578
2、配置Yum源
Zabbix在CentOS基本源里不可获得,因此必须配置EPEL 和Zabbix 官方repository
安装EPEL repository
yum install epel-release配置ZabbixZone package repository and GPG key
rpm --import http://repo.zabbix.com/RPM-GPG-KEY-ZABBIX3、安装Zabbix server and agent(agent是可选的)
rpm -Uv http://repo.zabbix.com/zabbix/2.4/rhel/7/x86_64/zabbix-release-2.4-1.el7.noarch.rpm
安装Zabbix server and agent:(配置自己监控自己,所以安装了zabbix-agent)
yum install zabbix-server-mysql zabbix-web-mysql zabbix-agent zabbix-java-gateway编辑 file /etc/httpd/conf.d/zabbix:
vi /etc/httpd/conf.d/zabbix.conf更新时区:
php_value date.timezone Asia/Shanghai重启httpd
systemctl restart httpd
4、创建MySQL 数据库和用户
登录MariaDB:
mysql –u root –p创建一个数据库‘zabbixdb’和数据库用户‘zabbix’
MariaDB [(none)]> create database zabbix character set utf8;


MariaDB [(none)]> grant all privileges on zabbix.* to 'zabbix'@'localhost' identified by 'zabbix';


MariaDB [(none)]> flush privileges;
5、数据库导入zabbix template
使用数据库用户zabbix登录数据库
mysql –uzabbix –p切换到zabbix数据库
use zabbix导入模板数据
MariaDB [zabbix]> source /usr/share/doc/zabbix-server-mysql-2.4.7/create/schema.sql


MariaDB [zabbix]> source /usr/share/doc/zabbix-server-mysql-2.4.7/create/images.sql


MariaDB [zabbix]> source /usr/share/doc/zabbix-server-mysql-2.4.7/create/data.sql
6、配置Zabbix server
编辑文件/etc/zabbix/zabbix_server.conf
vi /etc/zabbix/zabbix_server.conf配置下面的三个参数
[...]

DBName=zabbix

[...]

DBUser=zabbix

[...]

DBPassword=zabbix

[...]
7、配置zabbix-agent
vi /etc/zabbix/zabbix_agentd.conf配置zabbix server 的ip
[...]


## Line 85 - Specify Zabbix server ##


Server=127.0.0.1


[...]


## Line 126 - Specify Zabbix server ##


ServerActive=127.0.0.1


[...]


## Line 137 - Specify Zabbix server Hostname or IP address ##


Hostname=127.0.0.1


[...]
8、修改PHP 设置
修改php.ini为zabbix 建议的设置
编辑文件 php.ini
vi /etc/php.ini设置下面的参数
max_execution_time = 600

max_input_time = 600

memory_limit = 256

Mpost_max_size = 32M

upload_max_filesize = 16M

date.timezone = Asia/Shanghai
9、修改Firewall 和SELinux 设置
开放zabbix端口10050 and 10051.
firewall-cmd --permanent --add-port=10050/tcp重启firewall
firewall-cmd --permanent --add-port=10051/tcp
systemctl restart firewalld如果使用 SELinux, 运行以下命令使 Apache 可以和 Zabbix通信
setsebool -P httpd_can_connect_zabbix=1
10、允许Zabbix web console 对特定IP段可用 (可选)
编辑文件 /etc/httpd/conf.d/zabbix.conf
vi /etc/httpd/conf.d/zabbix.conf添加允许访问 zabbix web interface的ip段. 如果设置 ‘Allow from All’, 这可以允许全部可以访问
#启动zabbix-server 和zabbix-agent。重启httpd,,并设置zabbix-server和zabbix-agent开机自动启动
# Zabbix monitoring system php web frontend
#
Alias /zabbix /usr/share/zabbix
Options FollowSymLinks
AllowOverride None
Require all granted
php_value max_execution_time 300
php_value memory_limit 128M
php_value post_max_size 16M
php_value upload_max_filesize 2M
php_value max_input_time 300
php_value date.timezone Asia/Shanghai
Require all denied
Require all denied
systemctl start zabbix-server


systemctl start zabbix-agent


systemctl restart httpd


systemctl restart mariadb


systemctl enable zabbix-server


systemctl enable zabbix-agent  ---- (可选)
11、通过控制台配置Zabbix
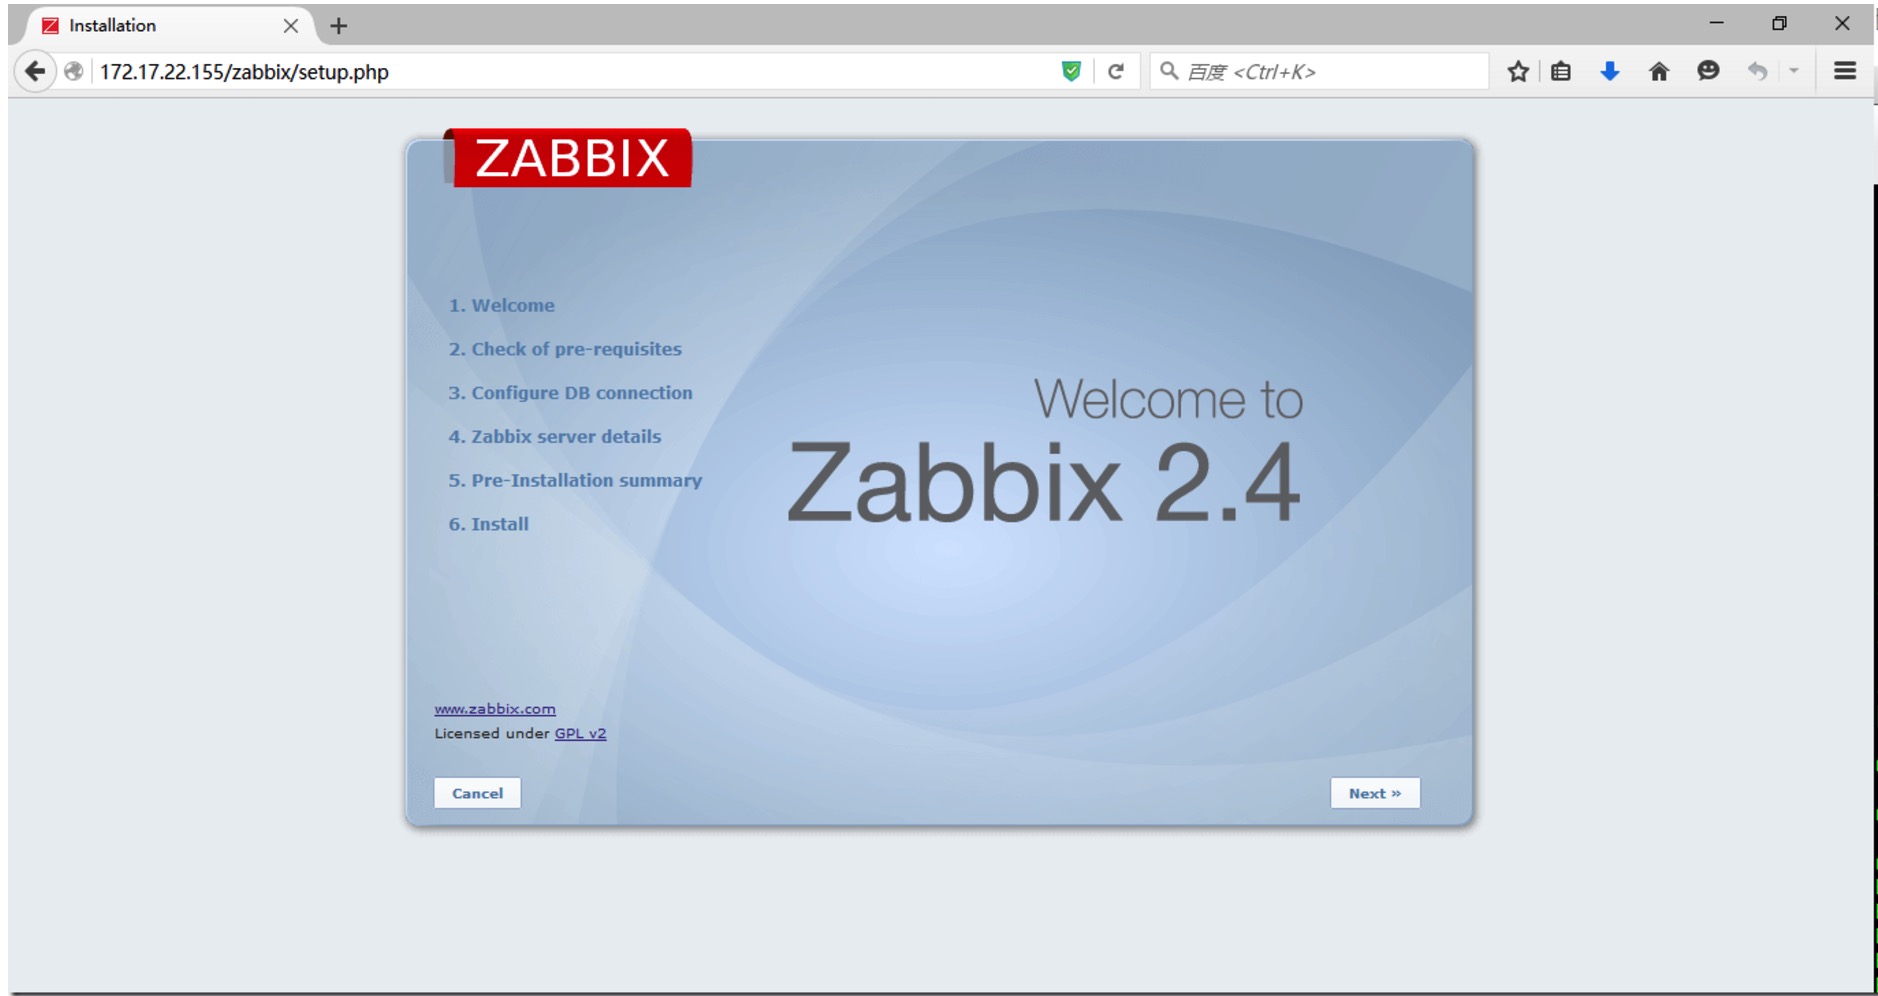
浏览器访问http://ip-address/zabbix
检查包的完整性和参数配置
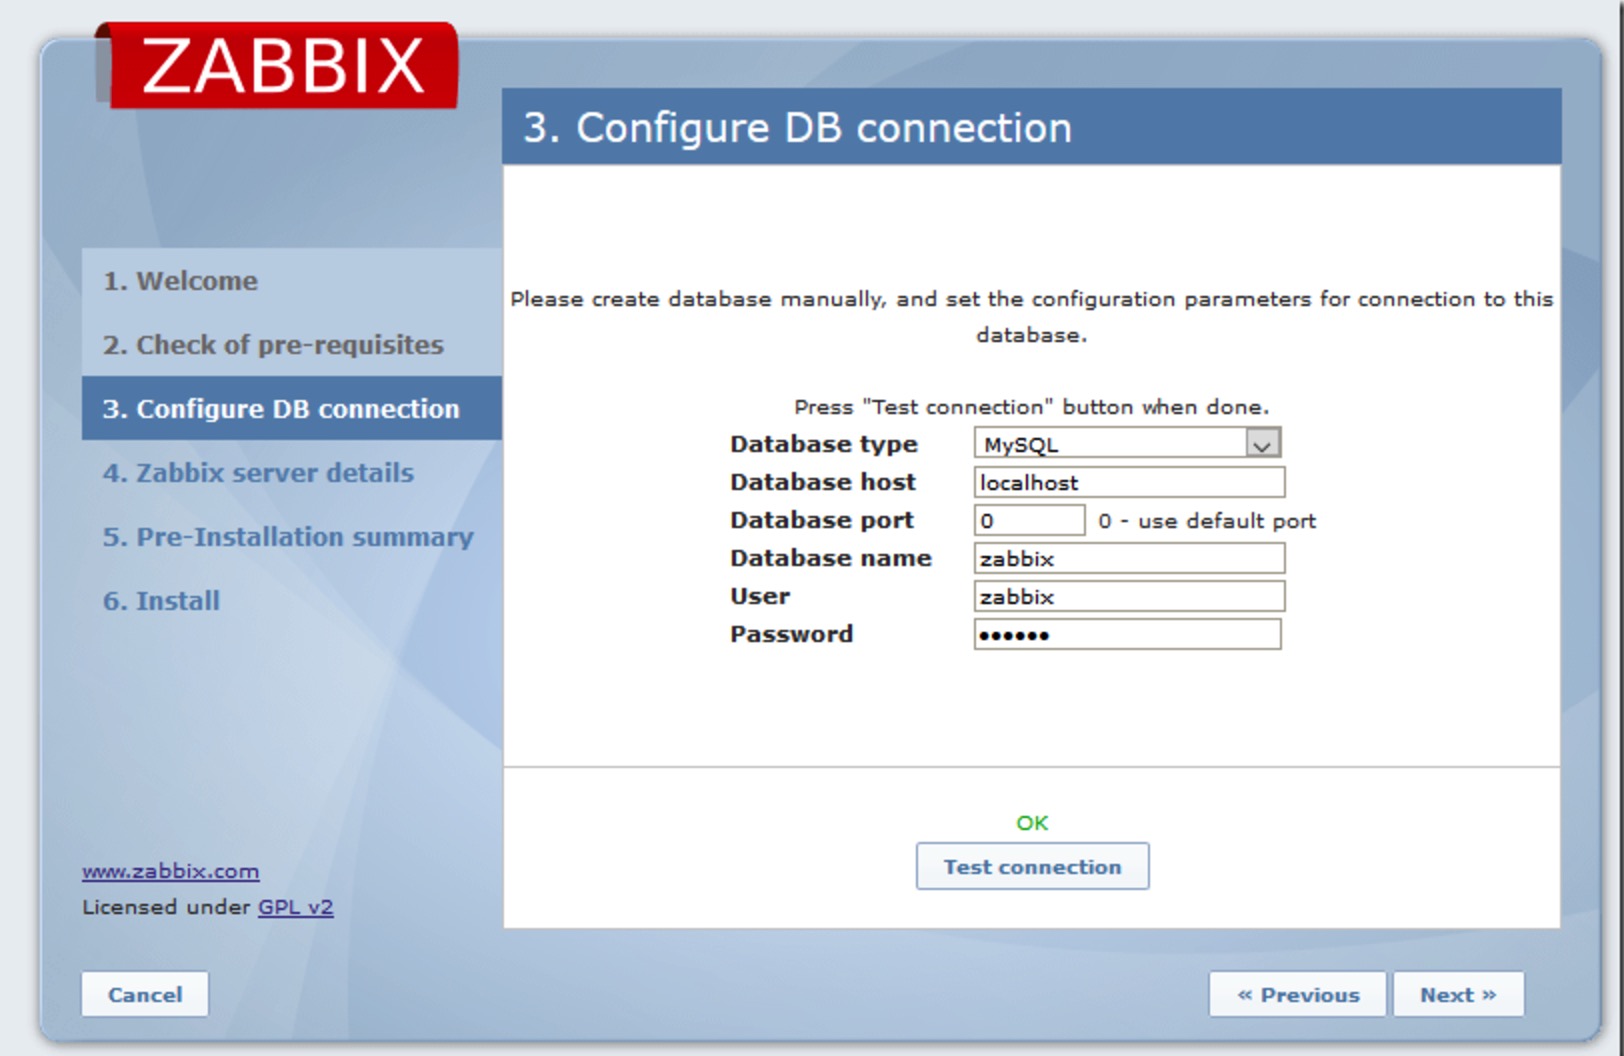
数据zabbix数据库名、数据库用户和密码,并测试
输入Server name(可选)
预安装summary
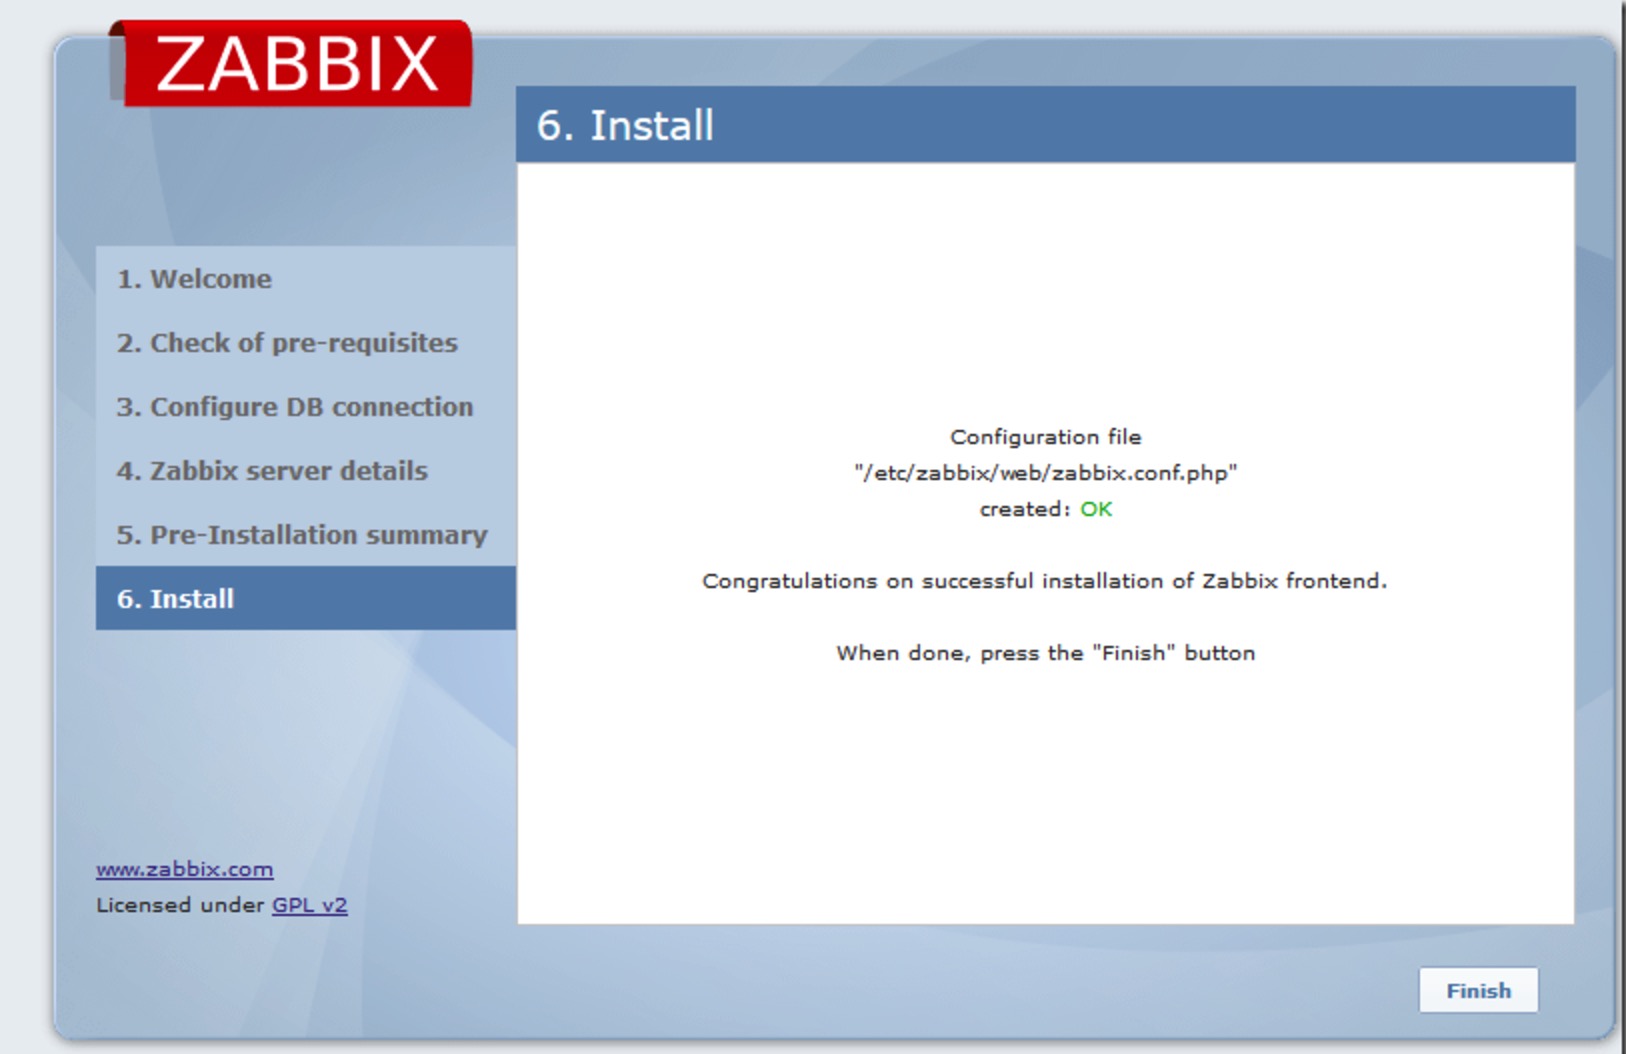
点击完成,完成安装
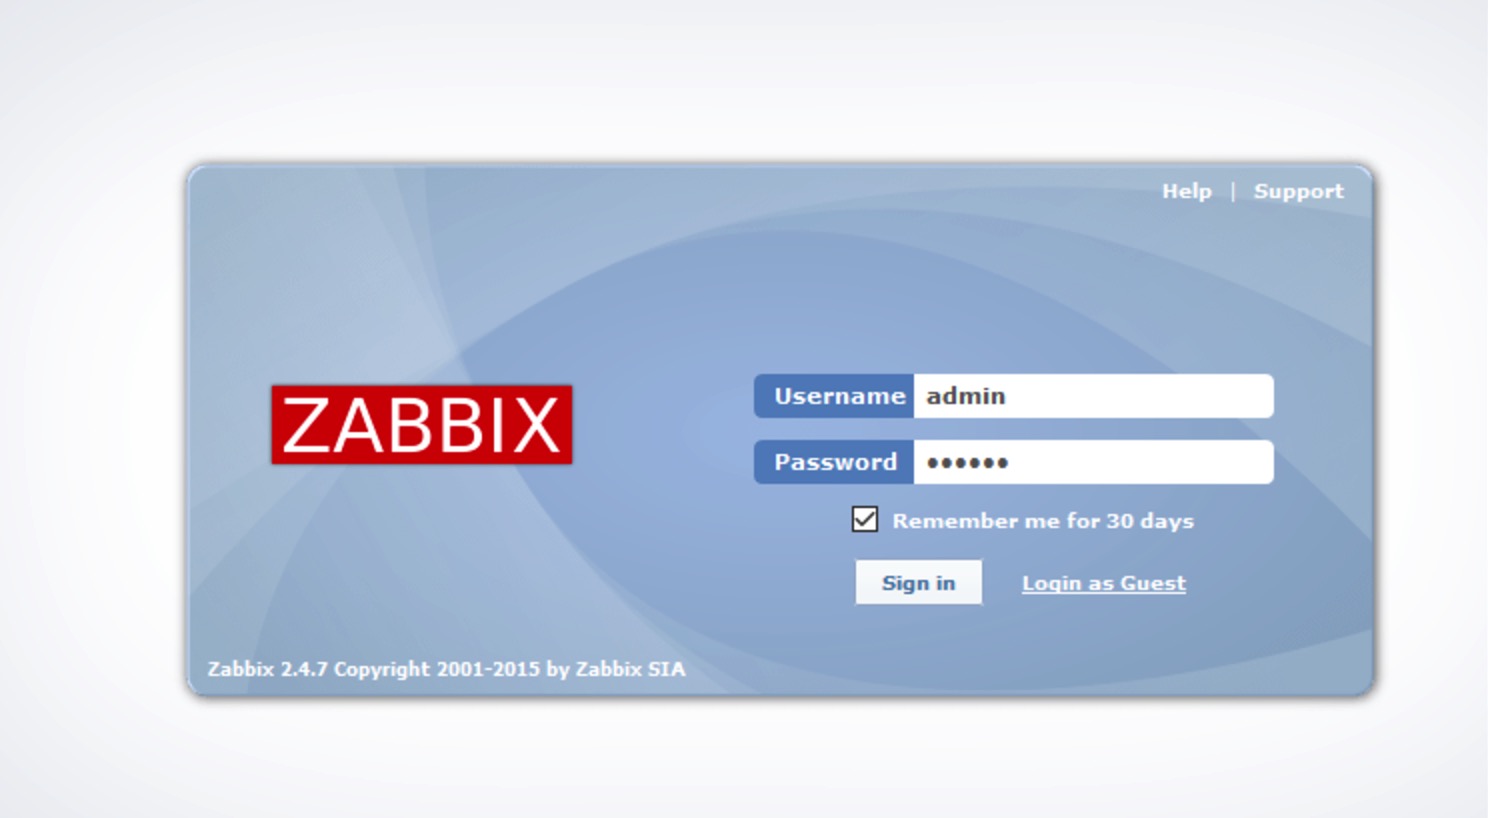
安装完成后,重定向到zabbix控制台登录页面. 输入用户名和密码,默认的用户名和密码为admin/zabbix.
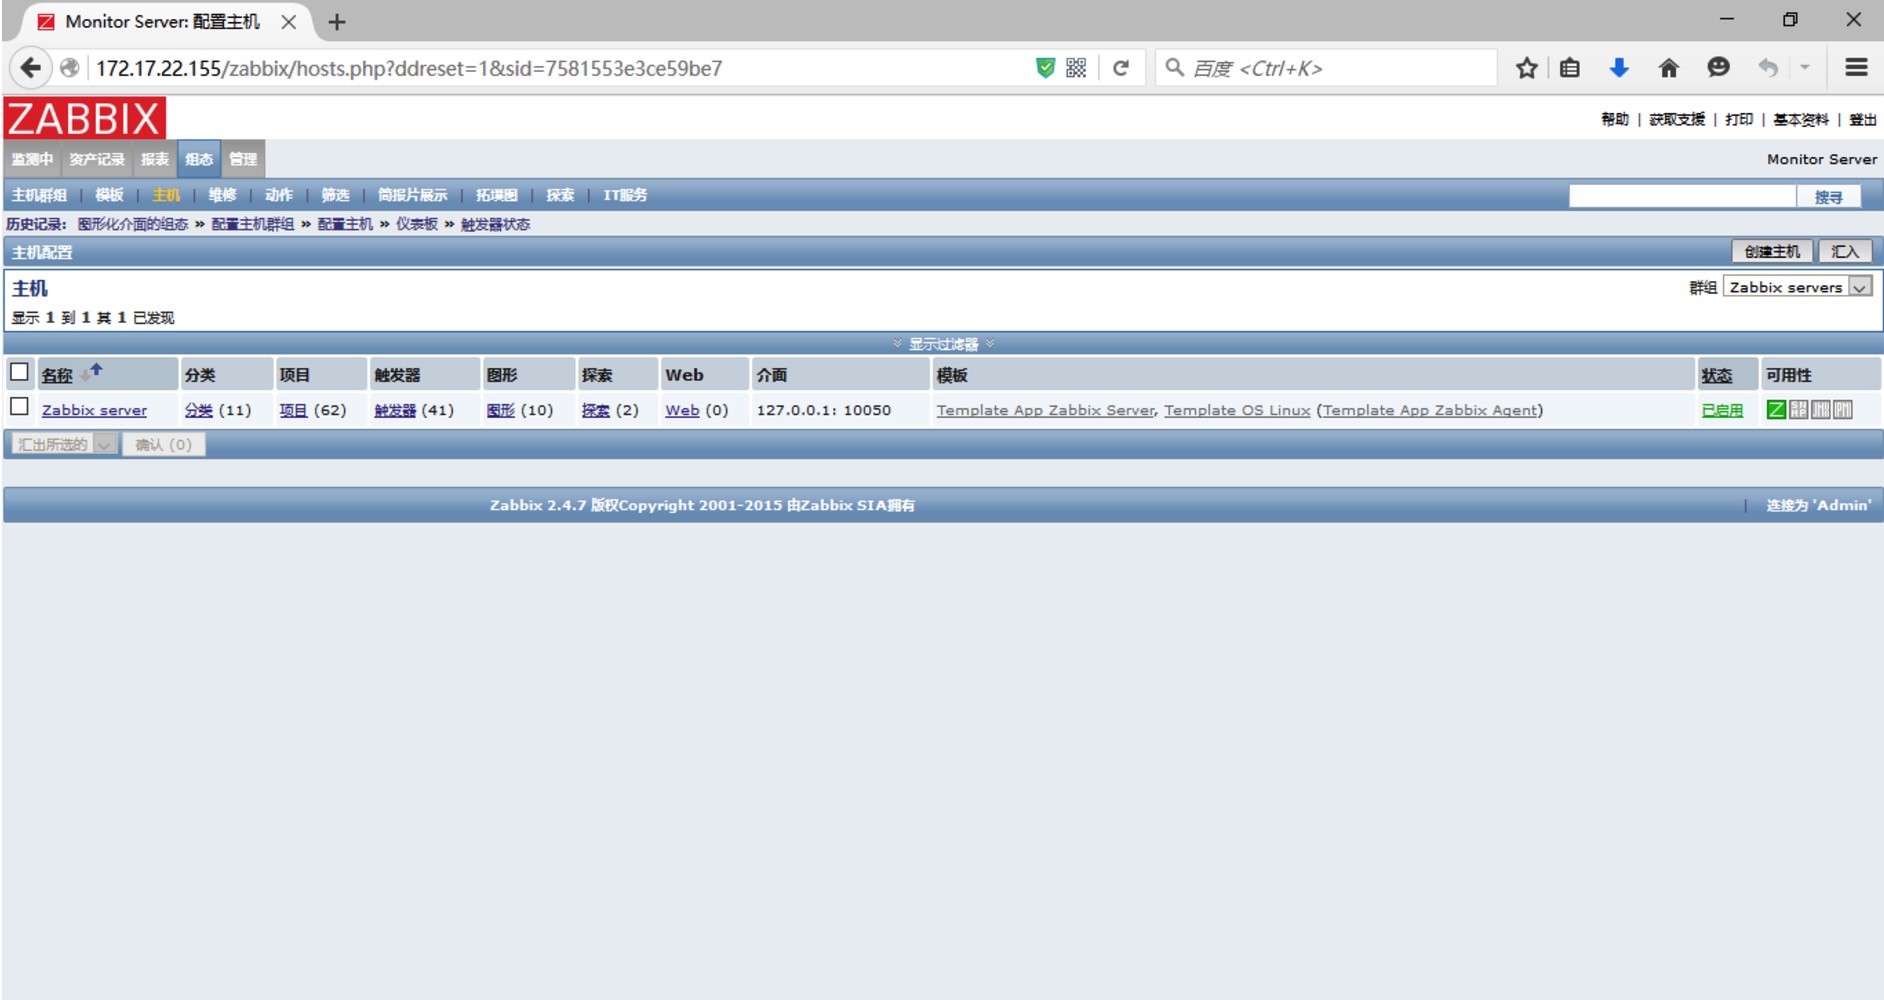
管理仪表盘页面如下
英文原文地址:http://www.unixmen.com/how-to-install-zabbix-server-on-centos-7/
Centos7下配置LAMP过程记录
运维 Geek小A 发表了文章 0 个评论 3428 次浏览 2017-06-17 00:45
下面讨论如何在RHEL/CentOS/Scientific Linux 7上搭建LAMP环境.
一、Install Apache
Apache HTTP Server(简称Apache)是Apache软件基金会的一个开放源码的网页服务器,可以在大多数计算机操作系统中运行,由于其多平台和安全性被广泛使用,是最流行的Web服务器端软件之一。它快速、可靠并且可通过简单的API扩展,将Perl/Python等解释器编译到服务器中。
在终端以root权限运行以下命令:
yum install httpd -y启动Apache
systemctl start httpd设置开机启动
systemctl enable httpdfirewall设置允许远程登录:
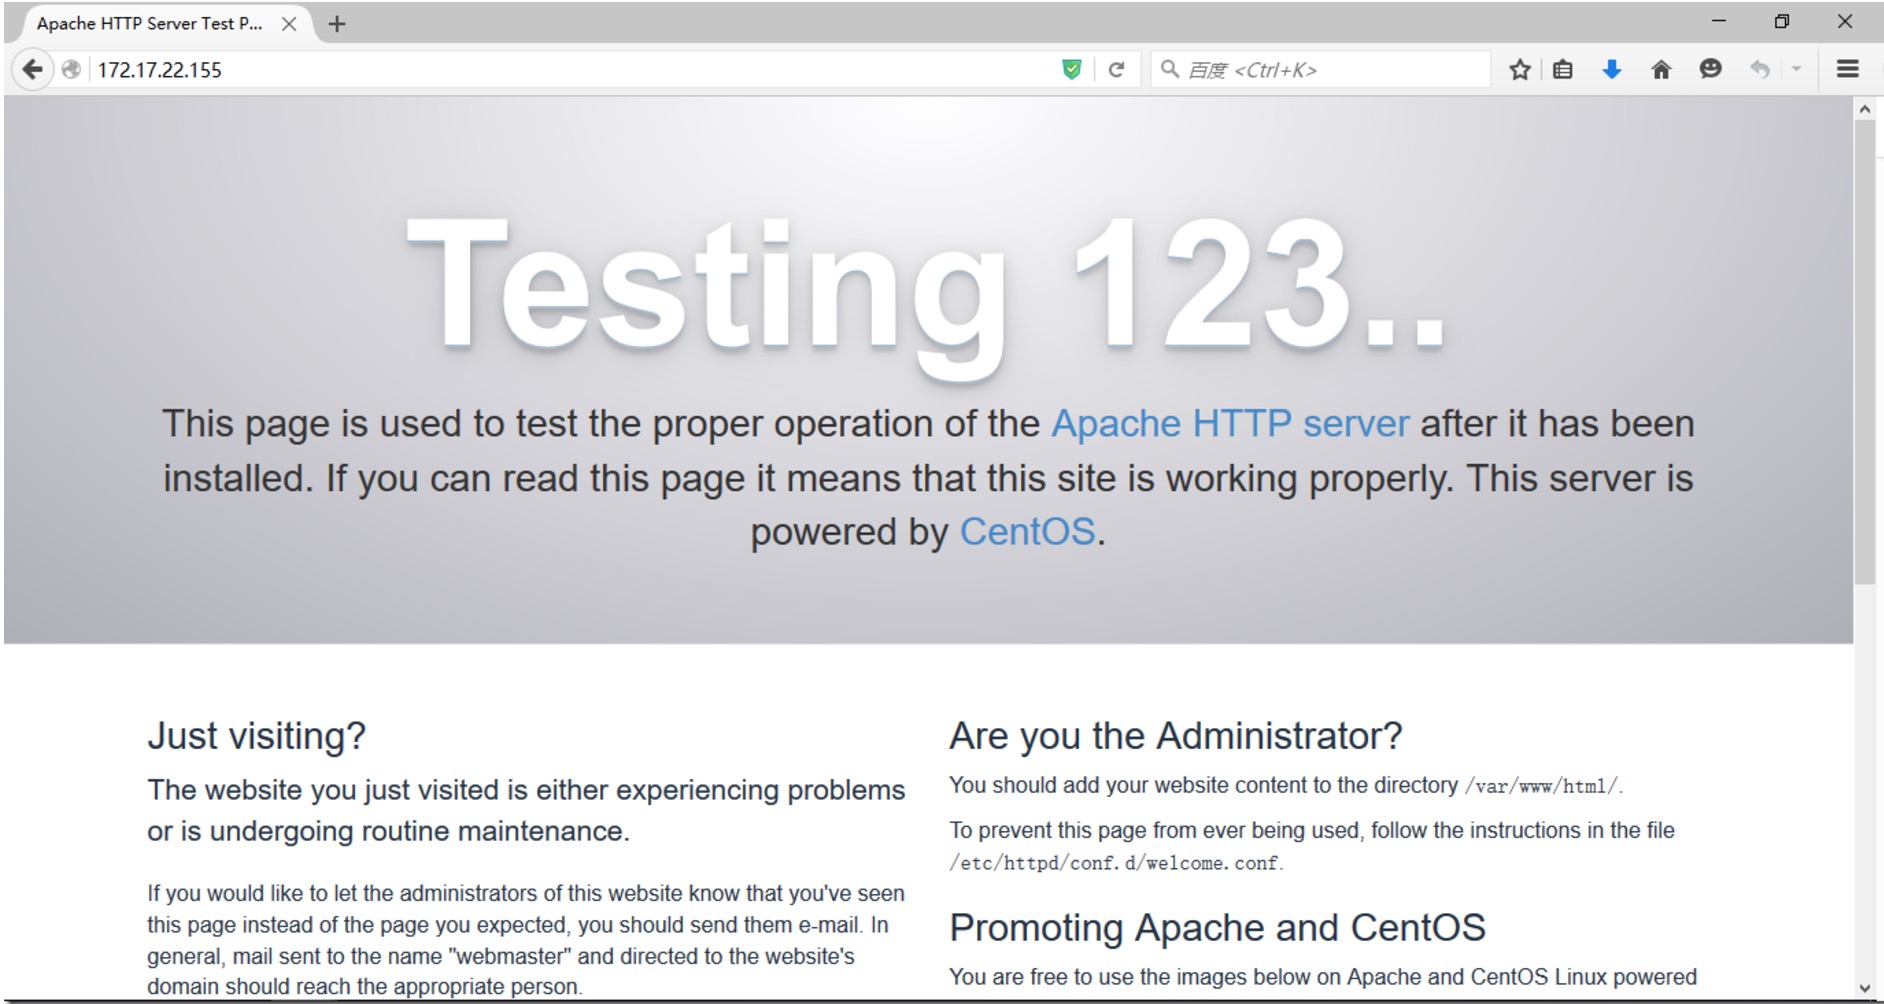
firewall-cmd --permanent --add-service=http测试Apache
systemctl restart firewalld
浏览器访问 http://localhost/ or http://server-ip-address/
二、Install MariaDB
MariaDB数据库管理系统是MySQL的一个分支,主要由开源社区在维护,采用GPL授权许可 MariaDB的目的是完全兼容MySQL,包括API和命令行,使之能轻松成为MySQL的代替品。 MariaDB由MySQL的创始人Michael Widenius(英语:Michael Widenius)主导开发,他早前曾以10亿美元的价格,将自己创建的公司MySQL AB卖给了SUN,此后,随着SUN被甲骨文收购,MySQL的所有权也落入Oracle的手中。MariaDB名称来自Michael Widenius的女儿Maria的名字。
安装MariaDB:
yum install mariadb-server mariadb -y启动MariaDB
systemctl start mariadb设置开机启动
systemctl enable mariadb设置root密码
默认情况下,root密码为空。为防止未授权的访问,我们设置root密码
mysql_secure_installation
三、Install PHP
PHP(外文名:PHP: Hypertext Preprocessor,中文名:“超文本预处理器”)是一种通用开源脚本语言,主要适用于Web开发领域。
使用以下的命令安装php
yum install php php-mysql php-gd php-pear -y测试PHP:
在Apache文档根目录创建“testphp.php”
vi /var/www/html/testphp.php编辑内容如下
phpinfo();重启 httpd 服务:
?>
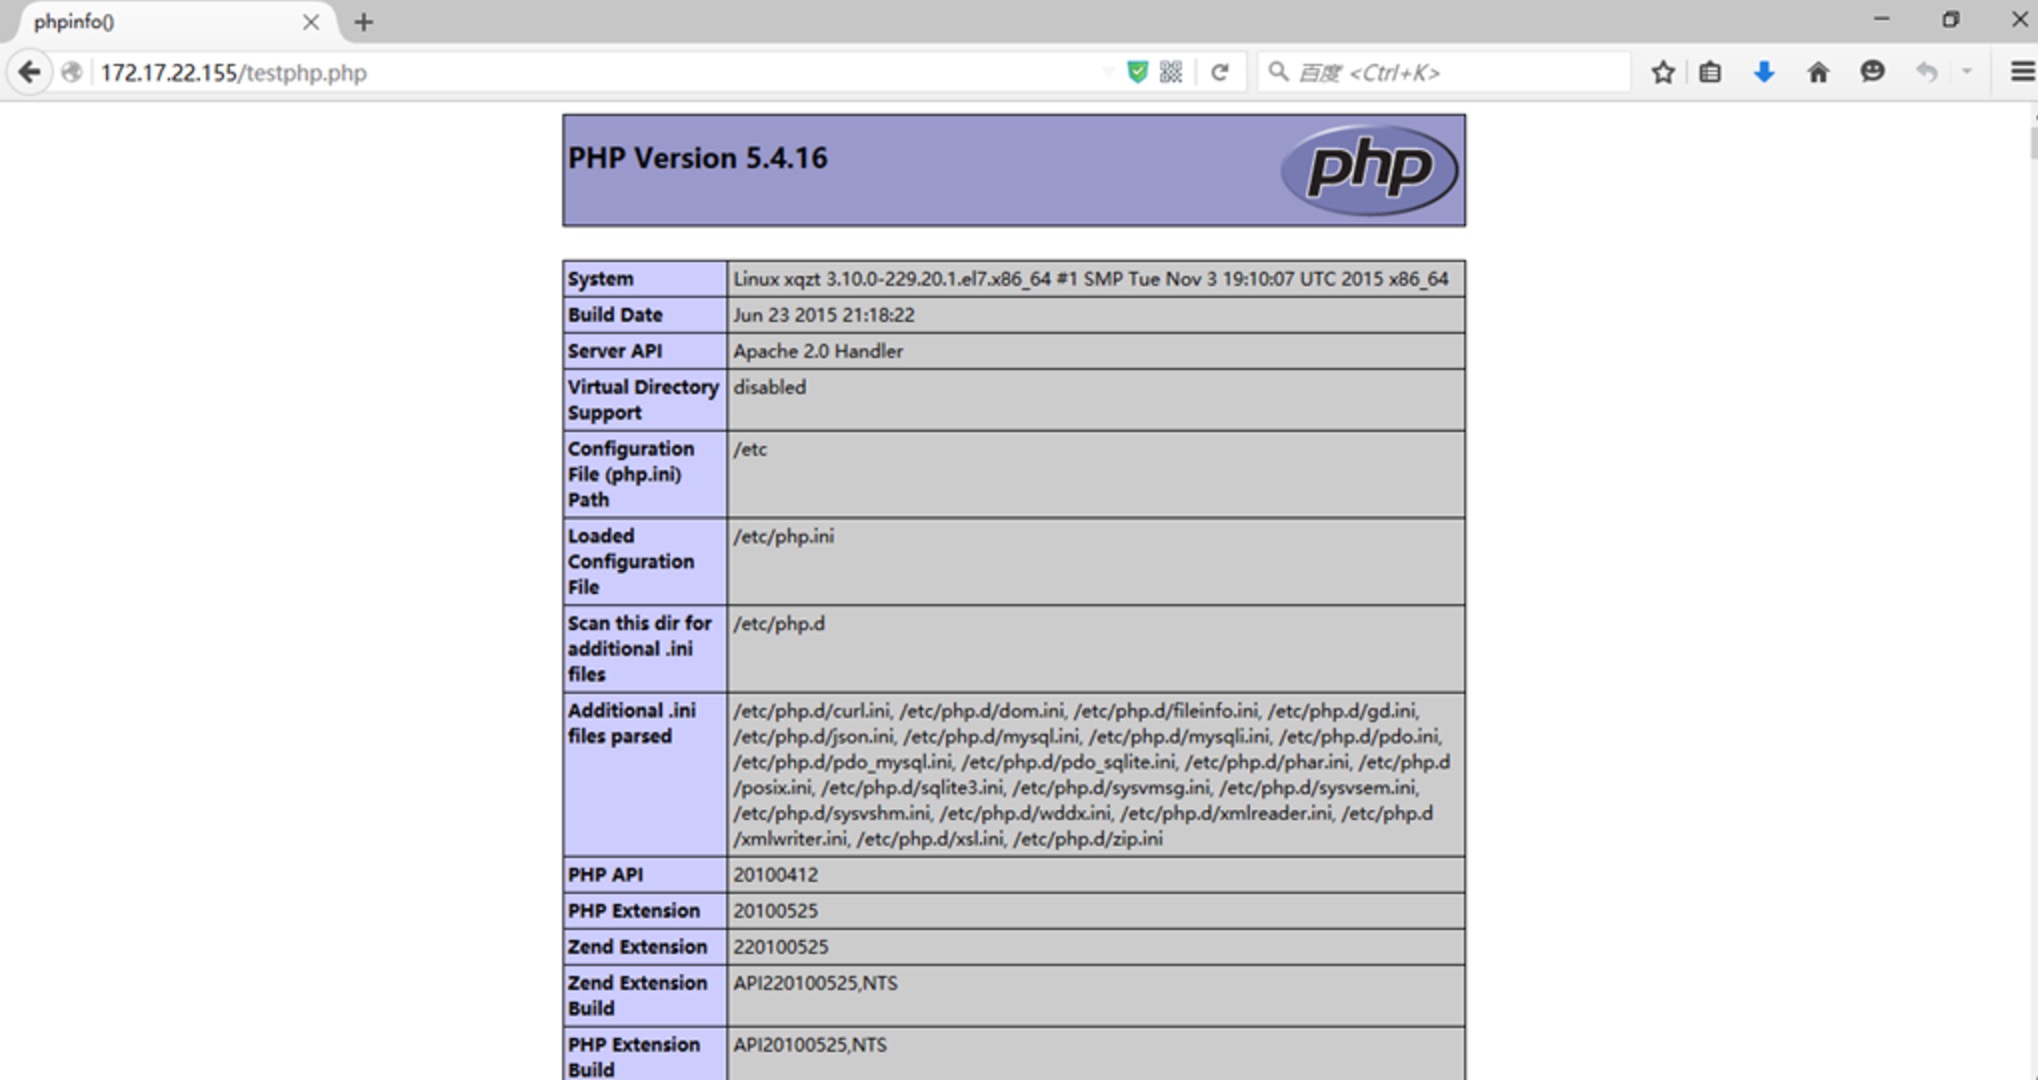
systemctl restart httpd浏览器访问 http://server-ip-address/testphp.php. 将会显示php的版本信息.
也可以使用如下命令安装所有php modules,重启httpd服务,查看http://server-ip-address/testphp.php ,可以看到所有安装的modules
yum install php* -y
四、Install phpMyAdmin (可选)
phpMyAdmin 是一个以PHP为基础,以Web-Base方式架构在网站主机上的MySQL的数据库管理工具,让管理者可用Web接口管理MySQL数据库。由于phpMyAdmin跟其他PHP程式一样在网页服务器上执行,您可以在任何地方使用这些程式产生的HTML页面,也就是于远端管理MySQL数据库,方便的建立、修改、删除数据库及资料表。也可借由phpMyAdmin建立常用的php语法,方便编写网页时所需要的sql语法正确性。
添加 EPEL repository 参照(Install EPEL Repository on RHEL/CentOS/Scientific Linux 7)
yum install epel-release安装 phpMyAdmin:
yum install phpmyadmin -y配置phpMyAdmin
默认,phpMyAdmin只能由本机访问。为了能够远程访问,编辑phpmyadmin.conf file:
vi /etc/httpd/conf.d/phpMyAdmin.conf查找/
   AddDefaultCharset UTF-8


     # Apache 2.4


       Require ip 127.0.0.1

       Require ip ::1


     # Apache 2.2

     Order Deny,Allow

     Deny from All

     Allow from 127.0.0.1

     Allow from ::1
# Apache 2.4
Require ip 127.0.0.1
Require ip ::1
# Apache 2.2
Order Deny,Allow
Deny from All
Allow from 127.0.0.1
Allow from ::1
添加
编辑“config.inc.php” 改变phpMyAdmin的authentication,修改“cookie” 为 “http”
        Options none

        AllowOverride Limit

        Require all granted
vi /etc/phpMyAdmin/config.inc.phpChange ‘cookie’ to ‘http’.
重启the Apache service:
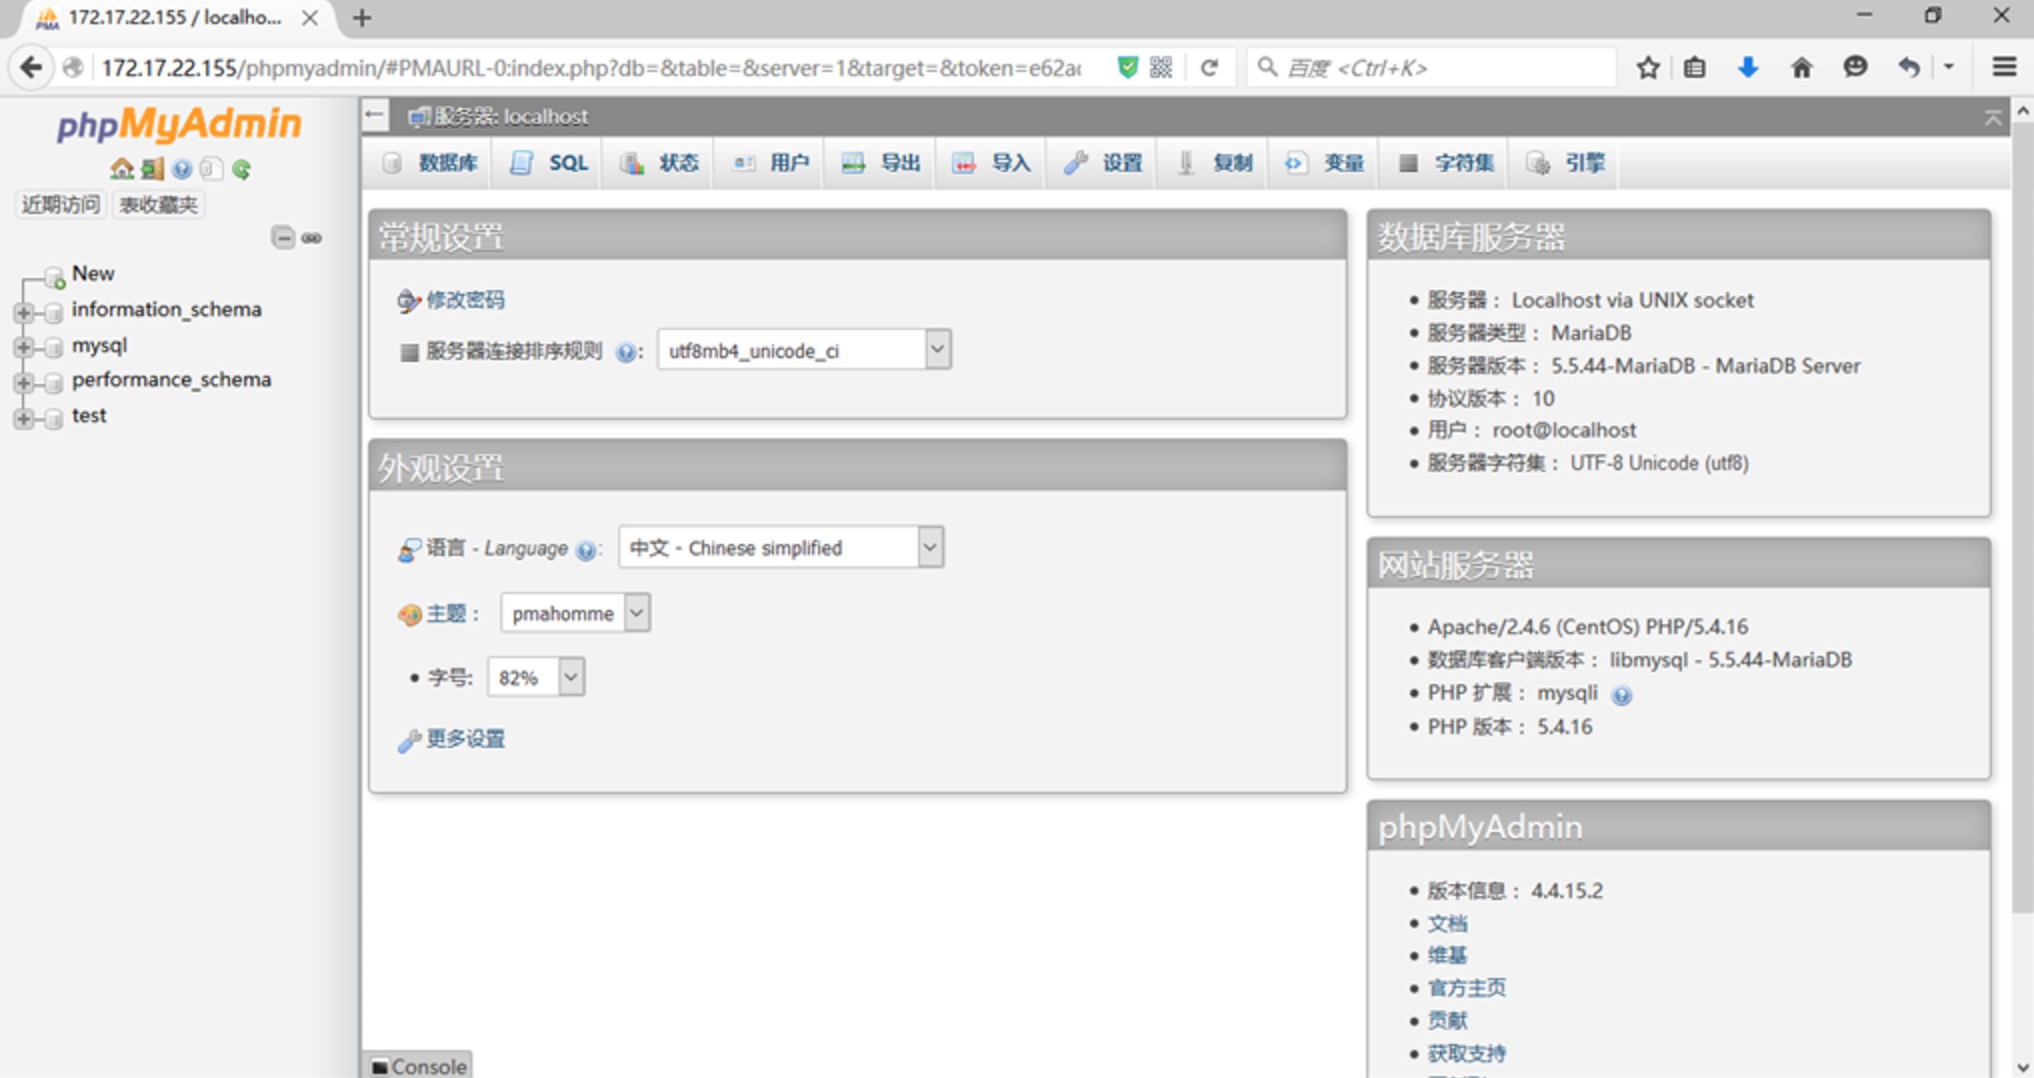
systemctl restart httpd访问 phpmyadmin 的控制台 http://server-ip-address/phpmyadmin/
输入MySQL username and password,将重定向到PhpMyAdmin main web interface.
现在你可以通过phpMyAdmin web interface 管理你的MariaDB数据库了。
Centos6下安装PHP7和Nginx
运维 Geek小A 发表了文章 0 个评论 3806 次浏览 2017-06-15 22:29
一、安装PHP
PHP源码包下载地址:
# wget http://cn2.php.net/distributions/php-5.6.22.tar.bz2

# wget http://cn2.php.net/distributions/php-7.0.7.tar.bz2
更新yum源
这里将Centos的yum源更换为国内的阿里云源。yum安装正常的可以跳过本步骤, 阿里云Linux安装镜像源地址: http://mirrors.aliyun.com/
1、备份你的原镜像文件,以免出错后可以恢复:
mv /etc/yum.repos.d/CentOS-Base.repo /etc/yum.repos.d/CentOS-Base.repo.backup
2、下载新的CentOS-Base.repo 到/etc/yum.repos.d/
# CentOS 5

wget -O /etc/yum.repos.d/CentOS-Base.repo http://mirrors.aliyun.com/repo/Centos-5.repo


# CentOS 6

wget -O /etc/yum.repos.d/CentOS-Base.repo http://mirrors.aliyun.com/repo/Centos-6.repo


# CentOS 7

wget -O /etc/yum.repos.d/CentOS-Base.repo http://mirrors.aliyun.com/repo/Centos-7.repo
3、生成缓存
yum clean all

yum makecache
安装依赖
yum install -y gcc gcc-c++ make cmake bison autoconf wget lrzsz需要编译libmcrypt、mhash、mcrypt库
yum install -y libtool libtool-ltdl-devel
yum install -y freetype-devel libjpeg.x86_64 libjpeg-devel libpng-devel gd-devel
yum install -y python-devel patch sudo
yum install -y openssl* openssl openssl-devel ncurses-devel
yum install -y bzip* bzip2 unzip zlib-devel
yum install -y libevent*
yum install -y libxml* libxml2-devel
yum install -y libcurl* curl-devel
yum install -y readline-devel
tar zxvf /libmcrypt-2.5.8.tar.gz \

&& cd /libmcrypt-2.5.8 && ./configure && make && make install && cd - / && rm -rf /libmcrypt* \

&& tar zxvf /mhash-0.9.9.9.tar.gz && cd mhash-0.9.9.9 && ./configure && make && make install && cd - / && rm -rf /mhash* \

&& tar zxvf /mcrypt-2.6.8.tar.gz && cd mcrypt-2.6.8 && LD_LIBRARY_PATH=/usr/local/lib ./configure && make && make install && cd - / && rm -rf /mcrypt*
开始安装
使用./configure --help查看编译支持的选项。如果写了不支持的选项,如php7里不支持--with-mysql=mysqlnd会提示:
configure: WARNING: unrecognized options: --with-mysql
wget http://cn2.php.net/distributions/php-7.0.7.tar.bz2可选项:
tar jxvf php-7.0.7.tar.bz2
cd php-7.0.7
$ ./configure --prefix=/usr/local/php --with-config-file-scan-dir=/usr/local/php/etc/ --enable-inline-optimization --enable-opcache --enable-session --enable-fpm --with-mysql=mysqlnd --with-mysqli=mysqlnd --with-pdo-mysql=mysqlnd --with-pdo-sqlite --with-sqlite3 --with-gettext --enable-mbregex --enable-mbstring --enable-xml --with-iconv --with-mcrypt --with-mhash --with-openssl --enable-bcmath --enable-soap --with-xmlrpc --with-libxml-dir --enable-pcntl --enable-shmop --enable-sysvmsg --enable-sysvsem --enable-sysvshm --enable-sockets --with-curl --with-curlwrappers --with-zlib --enable-zip --with-bz2 --with-gd --enable-gd-native-ttf --with-jpeg-dir --with-png-dir --with-freetype-dir --with-iconv-dir --with-readline
$ make
$ make install
--with-fpm-user=www --with-fpm-group=www这里面开启了很多扩展。如果这时候忘了开启,以后还能加上吗?答案是可以的。以后只需要进入源码的ext目录,例如忘了pdo_mysql,进入ext/pdo_mysql,使用phpize工具,像安装普通扩展一样即可生成pdo_mysql.so。
关于:--enable-safe-mode
开启的话php可以执行一下系统函数,建议关闭(可搜索受此函数影响的php函数)
#如果只需要配置某一个目录可以执行则 设置为on并指定 safe_mode_exec_dir=string目录来执行系统函数。php7编译不用加这个配置。
#本特性已自 PHP 5.3.0 起废弃并将自 PHP 5.4.0 起移除。
safe_mode = off
编译比较耗内存和CPU。等待半小时左右,编译完成:
Build complete.

Don't forget to run 'make test'.


Installing shared extensions:     /usr/local/php/lib/php/extensions/no-debug-non-zts-20151012/

Installing PHP CLI binary:        /usr/local/php/bin/

Installing PHP CLI man page:      /usr/local/php/php/man/man1/

Installing PHP FPM binary:        /usr/local/php/sbin/

Installing PHP FPM config:        /usr/local/php/etc/

Installing PHP FPM man page:      /usr/local/php/php/man/man8/

Installing PHP FPM status page:   /usr/local/php/php/php/fpm/

Installing phpdbg binary:         /usr/local/php/bin/

Installing phpdbg man page:       /usr/local/php/php/man/man1/

Installing PHP CGI binary:        /usr/local/php/bin/

Installing PHP CGI man page:      /usr/local/php/php/man/man1/

Installing build environment:     /usr/local/php/lib/php/build/

Installing header files:           /usr/local/php/include/php/

Installing helper programs:       /usr/local/php/bin/

  program: phpize

  program: php-config

Installing man pages:             /usr/local/php/php/man/man1/

  page: phpize.1

  page: php-config.1

Installing PEAR environment:      /usr/local/php/lib/php/

[PEAR] Archive_Tar    - installed: 1.4.0

[PEAR] Console_Getopt - installed: 1.4.1

[PEAR] Structures_Graph- installed: 1.1.1

[PEAR] XML_Util       - installed: 1.3.0

[PEAR] PEAR           - installed: 1.10.1

Wrote PEAR system config file at: /usr/local/php/etc/pear.conf

You may want to add: /usr/local/php/lib/php to your php.ini include_path

/php-7.0.7/build/shtool install -c ext/phar/phar.phar /usr/local/php/bin

ln -s -f phar.phar /usr/local/php/bin/phar

Installing PDO headers:           /usr/local/php/include/php/ext/pdo/


[root@e8ed9b00e80c php-7.0.7]# /usr/local/php/bin/php -m

[PHP Modules]

bcmath

bz2

Core

ctype

curl

date

dom

fileinfo

filter

gd

gettext

hash

iconv

json

libxml

mbstring

mcrypt

mysqli

mysqlnd

openssl

pcntl

pcre

PDO

pdo_mysql

pdo_sqlite

Phar

posix

readline

Reflection

session

shmop

SimpleXML

soap

sockets

SPL

sqlite3

standard

sysvmsg

sysvsem

sysvshm

tokenizer

xml

xmlreader

xmlrpc

xmlwriter

zip

zlib


[Zend Modules]
配置文件
需要从安装包里复制php.ini、php-fpm.conf到安装目录:
$ cp php-7.0.7/php.ini* /usr/local/php/etc/


$ cd /usr/local/php/etc/


$ cp php.ini-production php.ini

$ cp php-fpm.conf.default  php-fpm.conf


$ cp php-fpm.d/www.conf.default php-fpm.d/www.conf


$ ls

pear.conf  php-fpm.conf.default  php.ini-development  php.ini-production
配置php.ini
# 不显示错误,默认

display_errors = Off


# 在关闭display_errors后开启PHP错误日志(路径在php-fpm.conf中配置),默认

log_errors = On


# 字符集,默认

default_charset = "UTF-8"


# 文件上传大小,默认

upload_max_filesize = 2M


# 设置PHP的扩展库路径,,默认被注释了。

extension_dir = "/usr/local/php7/lib/php/extensions/no-debug-non-zts-20151012/"

# 如果不设置extension_dir,也可以直接写绝对位置:

# extension=/usr/local/php/lib/php/extensions/no-debug-non-zts-20151012/redis.so


# 设置PHP的时区

date.timezone = PRC


# 开启opcache,默认是0

[opcache]

; Determines if Zend OPCache is enabled

opcache.enable=1
配置php-fpm.conf
; 去掉里分号,方便以后重启。建议修改

; Default Value: none

; 下面的值最终目录是/usr/local/php/var/run/php-fpm.pid

; 开启后可以平滑重启php-fpm

pid = run/php-fpm.pid


; 设置错误日志的路径,可以默认值

; Note: the default prefix is /usr/local/php/var

; Default Value: log/php-fpm.log, 即/usr/local/php/var/log/php-fpm.log

error_log = /var/log/php-fpm/error.log


; Log等级,可以默认值

; Possible Values: alert, error, warning, notice, debug

; Default Value: notice

log_level = notice


; 后台运行,默认yes,可以默认值

; Default Value: yes

;daemonize = yes


; 引入www.conf文件中的配置,可以默认值

include=/usr/local/php/etc/php-fpm.d/*.conf
配置www.conf(在php-fpm.d目录下)
www.conf这是php-fpm进程服务的扩展配置文件:
; 设置用户和用户组,默认都是nobody。可以默认值保存配置文件后,检验配置是否正确的方法为:
user = nginx
group = nginx
; 设置PHP监听
; 下面是默认值,不建议使用。可以默认值
; listen = 127.0.0.1:9000
; 根据nginx.conf中的配置fastcgi_pass unix:/var/run/php-fpm/php-fpm.sock;
listen = /var/run/php-fpm/php-fpm.sock
######开启慢日志。可以默认值
slowlog = /var/log/php-fpm/$pool-slow.log
request_slowlog_timeout = 10s
/usr/local/php/sbin/php-fpm -t如果出现诸如 test is successful 字样,说明配置没有问题。另外该命令也可以让我们知道php-fpm的配置文件在哪。
建立软连接:
ln -sf /usr/local/php/sbin/php-fpm /usr/bin/或者将php编译生成的bin目录添加到当前Linux系统的环境变量中:
ln -sf /usr/local/php/bin/php /usr/bin/
ln -sf /usr/local/php/bin/phpize /usr/bin/
ln -sf /usr/local/php/bin/php-config /usr/bin/
ln -sf /usr/local/php/bin/php-cig /usr/bin/
echo -e '\nexport PATH=/usr/local/php/bin:/usr/local/php/sbin:$PATH\n' >> /etc/profile && source /etc/profile
启动php-fpm
/usr/local/php/sbin/php-fpm如果提示没有www用户(www.conf里填写了www而不是nobody),则新增:
useradd www检测是否启动:
chown -R www:www /www
ps aux |grep php-fpm # 另外该命令也可以让我们知道fpm的配置文件在哪。查看php-fpm进程数:
netstat -ant |grep 9000
ps aux | grep -c php-fpmphp-fpm操作汇总:
/usr/local/php/sbin/php-fpm # php-fpm启动重启方法二:
kill -INT `cat /usr/local/php/var/run/php-fpm.pid` # php-fpm关闭
kill -USR2 `cat /usr/local/php/var/run/php-fpm.pid` #php-fpm重启
killall php-fpm如果无法平滑启动,那就终止进程id:
/usr/local/php/sbin/php-fpm &
ps aux | grep php-fpm

kill -9  1210  #1210指php-fpm进程id
二、安装Nginx
安装包下载地址: http://nginx.org/download/nginx-1.11.1.tar.gz
依赖:
# 为了支持rewrite功能,我们需要安装pcre配置编译参数
yum install pcre-devel
# 需要ssl的支持,如果不需要ssl支持,请跳过这一步
# yum install openssl*
# gzip 类库安装,按需安装
# yum install zlib zlib-devel
$ tar -zxvf nginx-1.11.1.tar.gz配置ok:
$ cd nginx-1.11.1
$ ./configure \
--prefix=/usr/local/nginx \
--with-http_stub_status_module \
--with-http_ssl_module \
--with-http_realip_module \
--with-http_sub_module \
--with-http_gzip_static_module \
--with-pcre
Configuration summary编译安装nginx
+ using system PCRE library
+ using system OpenSSL library
+ md5: using OpenSSL library
+ sha1: using OpenSSL library
+ using system zlib library
nginx path prefix: "/usr/local/nginx"
nginx binary file: "/usr/local/nginx/sbin/nginx"
nginx modules path: "/usr/local/nginx/modules"
nginx configuration prefix: "/usr/local/nginx/conf"
nginx configuration file: "/usr/local/nginx/conf/nginx.conf"
nginx pid file: "/usr/local/nginx/logs/nginx.pid"
nginx error log file: "/usr/local/nginx/logs/error.log"
nginx http access log file: "/usr/local/nginx/logs/access.log"
nginx http client request body temporary files: "client_body_temp"
nginx http proxy temporary files: "proxy_temp"
nginx http fastcgi temporary files: "fastcgi_temp"
nginx http uwsgi temporary files: "uwsgi_temp"
nginx http scgi temporary files: "scgi_temp"
make设置软连接:
make install
ln -sf /usr/local/nginx/sbin/nginx /usr/sbin检测nginx:
nginx -t显示:nginx: configuration file /usr/local/nginx/conf/nginx.conf test is successful
成功了。我们重新配置下nginx.conf:
#user nobody;配置localhost:
worker_processes 1;
#error_log logs/error.log;
#error_log logs/error.log notice;
#error_log logs/error.log info;
#pid logs/nginx.pid;
events {
worker_connections 1024;
}
http {
include mime.types;
default_type application/octet-stream;
# 解决虚拟主机名字过长 http://www.jb51.net/article/26412.htm
server_names_hash_bucket_size 128;
#log_format main '$remote_addr - $remote_user [$time_local] "$request" '
# '$status $body_bytes_sent "$http_referer" '
# '"$http_user_agent" "$http_x_forwarded_for"';
#access_log logs/access.log main;
sendfile on;
#tcp_nopush on;
#keepalive_timeout 0;
keepalive_timeout 65;
#gzip on;
autoindex on;# 显示目录
autoindex_exact_size on;# 显示文件大小
autoindex_localtime on;# 显示文件时间
include vhosts/*.conf;
}
vim ./vhosts/localhost.conf
server {

    listen       80;

    server_name  localhost;


    #charset utf-8;


    #access_log  logs/host.access.log  main;


    location / {

        root   /www/www/;

        index  index.php index.html index.htm;

    }


    #error_page  404              /404.html;


    # redirect server error pages to the static page /50x.html

    #

    error_page   500 502 503 504  /50x.html;

    location = /50x.html {

        root   html;

    }


    # proxy the PHP scripts to Apache listening on 127.0.0.1:80

    #

    #location ~ \.php$ {

    #    proxy_pass   http://127.0.0.1;

    #}


    # pass the PHP scripts to FastCGI server listening on 127.0.0.1:9000

    #

    location ~ \.php$ {

        root           /www/www/;

        fastcgi_pass   127.0.0.1:9000;

        fastcgi_index  index.php;

        fastcgi_param  SCRIPT_FILENAME  $document_root$fastcgi_script_name;

        include        fastcgi_params;

    }

}启动nginx:/usr/local/nginx/sbin/nginx重启:
# 或者
nginx
/usr/local/nginx/sbin/nginx -s reload停止:
# 或者
nginx -s reload
/usr/local/nginx/sbin/nginx -s stop如果提示80端口被占用了,可以使用ps aunx | grep 80查看。一般是apache占用了。可以使用:
# 或者
nginx -s stop
chkconfig --list禁止apache启动并关闭apache服务。
chkconfig nginx on
service apache off
三、安装扩展
1、安装swoole
Swoole: PHP的异步、并行、高性能网络通信引擎:http://www.swoole.com/
wget https://github.com/swoole/swoole-src/archive/swoole-1.8.5-stable.zip

unzip swoole-1.8.5-stable.zip

cd swoole-1.8.5-stable

phpize

./configure

make && make install
2、安装redis
wget https://github.com/nicolasff/phpredis/archive/2.2.4.tar.gz

tar -zxvf 2.2.4

cd phpredis-2.2.4/

phpize

./configure

make && make install
四、信号管理
不重载配置启动新/旧工作进程
kill -HUP 旧/新版主进程号从容关闭旧/新进程
kill -QUIT 旧/新主进程号如果此时报错,提示还有进程没有结束就用下面命令先关闭旧/新工作进程,再关闭主进程号:
kill -TERM 旧/新工作进程号升级、添加或删除模块时,我们需要停掉服务器
kill -USR2 旧版程序的主进程号或进程文件名
安装PHP编译出错合集记录
编程 push 发表了文章 0 个评论 3703 次浏览 2017-06-15 19:08
-liconv -o sapi/fpm/php-fpm
/usr/bin/ld: cannot find -liconv
collect2: ld returned 1 exit status
make: *** [sapi/fpm/php-fpm] Error 1
初步定位是iconv的问题,解决方法 把libiconv卸载掉,进入libiconv源码目录执行:
# make uninstall再进入php源码目录:
# make clean
# ./configure –prefix=/usr/local/libiconv
# make
# make install
./configure php 时加上参数 --with-iconv=/usr/local/libiconv
情况二:
/usr/bin/ld: cannot find -lltdl
collect2: ld returned 1 exit status
make: *** [sapi/cgi/php-cgi] Error 1
解决办法安装包如下:
# yum install libtool-ltdl.x86_64 libtool-ltdl-devel.x86_64
情况三:
collect2: ld returned 1 exit status
make: *** [sapi/cgi/php-cgi] Error 1
解决办法, 请安装lib所需的安装包:
yum install ntp vim-enhanced gcc gcc-c++ gcc-g77 flex bison autoconf automake bzip2-devel ncurses-devel zlib-devel libjpeg-devel libpng-devel libtiff-devel freetype-devel libXpm-devel gettext-devel pam-devel kernel执行安装完以后即可解决问题
make && make install
情况四:
ext/iconv/iconv.o: In function `php_iconv_stream_filter_ctor’:编译参数如下:
/usr/local/soft/php-5.2.14/ext/iconv/iconv.c:2491: undefined reference to `libiconv_open’
collect2: ld returned 1 exit status
make: *** [sapi/cgi/php-cgi] Error 1
./configure –prefix=/usr/local/php –with-gd=/usr/local/gd –with-jpeg-dir=/usr/local/jpeg –with-png-dir=/usr/local/png –with-freetype-dir=/usr/local/freetype –with-mysql=/usr/local/mysql –enable-fastcgi –enable-fpm解决办法:
增加 --disable-cli 编译参数。
情况五:
ext/xmlreader/php_xmlreader.o: In function `zim_xmlreader_XML':
/usr/local/src/php-5.2.8/ext/xmlreader/php_xmlreader.c:1109: undefined reference to `xmlTextReaderSetup'
collect2: ld returned 1 exit status
make: *** [sapi/cgi/php-cgi] Error 1
解决办法:折腾了半天,最后先make clean 一下,然后把所有libxml2相关的包都装上重新编译就ok了。
情况六:
运行可能报错 :我遇到xsl和mcrypt两个库报错,重新安装一下xsl的dev包就可以:
CentOS : yum install libxslt-devel libmcrypt-devel如果你有其他的库不满足,搜索一下该库,安装一下即可,这一步应该没有太多问题。
Debian : apt-get install libxslt1-dev libmcrypt-dev
编译:make
我在Debian下make正常,但在CentOS下却提示make错误,
make: *** [sapi/fpm/php-fpm] Error 1 错误中出现 libiconv,应该是iconv包问题,
使用下面的命令替换即可:
make ZEND_EXTRA_LIBS='-liconv'
完成后:
make test

make install
单独编译添加PHP的pdo_mysql模块
运维 being 发表了文章 0 个评论 3472 次浏览 2017-06-14 22:53
先找需要的版本,我用的是稳定的版本。要先看看说明,特别是要注意mysql的php的版本
# wget http://pecl.php.net/get/PDO_MYSQL-1.0.2.tgz执行完以后,报如下错误:
# tar xzvf PDO_MYSQL-1.0.2.tgz
# cd PDO_MYSQL-1.0.2
# /usr/local/php/bin/phpize
Configuring for:
PHP Api Version: 20041225
Zend Module Api No: 20060613
Zend Extension Api No: 220060519
# ./configure
checking for mysql_config... not found这个错误表明系统缺省没有找到你的mysql安装目录,因此可以使用这个命令解决:
configure: error: Cannot find MySQL header files under
ln -s /usr/local/mysql/bin/mysql_config /usr/bin/mysql_config这样建立了你的实际msyql安装目录和mysql_config命令的管理
经过configure就可以make了
在执行:./configure 时,又出现了一个问题:
checking for PDO includes... checking for PDO includes...检查的时候,不能找到php_pdo_driver.h,经过检查,发现在读php-config的时候,在读以前的配置。
configure: error: Cannot find php_pdo_driver.h.
解决方法:
./configure –with-php-config=/usr/local/php/bin/php-config (根据实际的路径的来指定)在执行./configure --with-php-config=/usr/local/php/bin/php-config,又出现了一个问题:
error: mysql_query missing!?解决方法:
./configure --with-php-config=/opt/php5/bin/php-config --with-pdo-mysql=/usr/local/mysql(根据自己的实际路径,设定编译安装mysql的位置).
make && make install注意pdo_mysql的全路径,我的是:
/usr/local/php/lib/php/extensions/no-debug-non-zts-20060613/pdo_mysql.so
然后在/usr/local/lib/php.ini加上一句:
extension=/usr/local/php/lib/php/extensions/no-debug-non-zts-20060613/pdo_mysql.so重新启动apache即可看到已经加载pdo_mysql成功。
PHP添加memcache模块
编程 chris 发表了文章 0 个评论 2756 次浏览 2017-01-10 03:37
下载memcache模块源码
memcached不用说了,都知道是做数据缓冲用的,这里为 php 添加memcached 的支持。
php的memcache 模块地址 http://pecl.php.net/package/memcache :
# wget http://pecl.php.net/get/memcache-2.2.3.tgz
编译安装源码包
# tar -zxvf memcache-2.2.3.tgz编辑php.ini添加extension = “memcache.so”即可。
# cd memcache-2.2.3/
# /usr/local/php5.3.6/bin/phpize
# ./configure –with-php-config=/usr/local/php5.3.6/bin/php-config
# make
# make install
Installing shared extensions: /usr/local/php5.3.6/lib/php/extensions/no-debug-non-zts-20090626/
为已编译安装的PHP动态添加gd模块
编程 chris 发表了文章 0 个评论 3774 次浏览 2017-01-10 03:10
安装 gd 前置库 : freetype ,jpegsrc,libpng
1、freetype
# wget "http://download.savannah.gnu.org/releases/freetype/freetype-2.4.0.tar.bz2"

# tar jxvf freetype-2.4.0.tar.bz2

# cd freetype-2.4.0

# ./configure --prefix=/usr/local/freetype && make && make install
2、jpegsrc
# wget "http://www.ijg.org/files/jpegsrc.v9.tar.gz"

# tar zxvf jpegsrc.v9.tar.gz

# cd jpeg-9

# CFLAGS="-O3 -fPIC" ./configure --prefix=/usr/local/jpeg && make && make install

# mkdir -p /usr/local/jpeg/include

# mkdir -p /usr/local/jpeg/lib

# mkdir -p /usr/local/jpeg/bin

# mkdir -p /usr/local/jpeg/man/man1
3、libpng
# wget "http://downloads.sourceforge.net/project/libpng/libpng12/1.2.50/libpng-1.2.50.tar.gz"

# tar zxvf libpng-1.2.50.tar.gz

# cd libpng-1.2.50

# CFLAGS="-O3 -fPIC" ./configure --prefix=/usr/local/libpng && make && make install
phpize编译安装gd模块
举一个例子:
假如你的 PHP 不支持gd库,php的源码包在/usr/local/src/php-5.3.6/,php安装目录在/usr/local/php5.3.6/
执行命令 /usr/local/php/bin/phpize, 什么时候需要用到 phpize 呢?当我们需要再加些模块,又不想重新编译php,这些我们就可以用phpize了。
# cd /usr/local/src/php-5.3.6/ext/gd/现在可以进行单独编译安装了:
# /usr/local/php5.3.6/bin/phpize
# ./configure --with-php-config=/usr/local/php5.3.6/bin/php-config --with-jpeg-dir=/usr/local/jpeg --with-png-dir=/usr/local/libpng --with-freetype-dir=/usr/local/freetype安装成功结果:
# make && make install
[root@web1 gd]# make install

Installing shared extensions:     /usr/local/php5.3.6/lib/php/extensions/no-debug-non-zts-20090626/

Installing header files:          /usr/local/php5.3.6/include/php/
修改php.ini配置文件:
extension_dir = "/usr/local/php5.3.6/lib/php/extensions/no-debug-non-zts-20090626/"验证:
extension=gd.so
[root@web1 gd]# /usr/local/php5.3.6/bin/php -m |grep -i gd到这就结束了。
gd
Centos下扩展PHP模块Imagick详解
编程 being 发表了文章 0 个评论 3795 次浏览 2016-12-20 20:39
简介
imagick是一个PHP的扩展,它调用ImageMagick提供的API来进行图片的操作
ImageMagick是一套软件系列,主要用于图片的创建、编辑以及转换等,详细的解释见ImageMagick的官方网站http://www.imagemagick.org/ ,ImageMagick与GD的性能要高很多,如果是在处理大量的图片时更加能体现ImageMagick的性能。
通常安装安装php的imagick扩展模块有两种方法,一种是利用pcel安装imagick(适用于php verison 5.4 或者更高),第二种就是手动下载编译安装,下面依次介绍。
一、pcel安装imagick
1、首先安装ImageMagick
# cd /usr/local/src/官网地址:http://www.imagemagick.org/
# wget ftp://ftp.u-aizu.ac.jp/pub/graphics/image/ImageMagick/imagemagick.org/ImageMagick-6.8.7-0.tar.gz
# tar zxf ImageMagick-6.8.7-0.tar.gz
# cd ImageMagick-6.8.7-0
# ./configure -prefix=/usr/local/imagemagick
# make && make install
2、安装imagick
# 首先进入到PHP的bin目录产生的imagick.so文件拷贝到/usr/local/php5.6.26/lib/php/extensions/no-debug-non-zts-20131226下
# cd /usr/local/php5.6.26/bin/
# ./pecl install imagick
................
Build process completed successfully
Installing '/usr/local/php5.6.26/lib/php/extensions/no-debug-non-zts-20131226/imagick.so'
Installing '/usr/local/php5.6.26/include/php/ext/imagick/php_imagick_shared.h'
install ok: channel://pecl.php.net/imagick-3.4.3RC1
configuration option "php_ini" is not set to php.ini location
You should add "extension=imagick.so" to php.ini
在php.ini文件里添加imagick.so,然后重启php加载imagick模块即可,使用/usr/local/php5.6.26/bin/php -m 命令查看模块是否添加成功。
二、编译安装imagick
1、首先安装ImageMagick 同上
2、编译安装imagick
# wget http://pecl.php.net/get/imagick-3.1.2.tgz在php配置文件php.ini中添加:
# tar zxf imagick-3.1.2.tgz
# cd imagick-3.1.2
# /usr/local/php5.3.6/bin/phpize (这个看你php安装路径)
# 注:phpize是一个shell脚本,主要是用来进行编译环境的准备,执行以后会生成一些新的文件,为配置、编译及安装作好准备
# ./configure --with-php-config=/usr/local/php5.3.6/bin/php-config --with-imagick=/usr/local/imagemagick
# make && make install
extension=imagick.so重启apache或php-fpm就可以了。
